High-line camera upgrade (part 4)
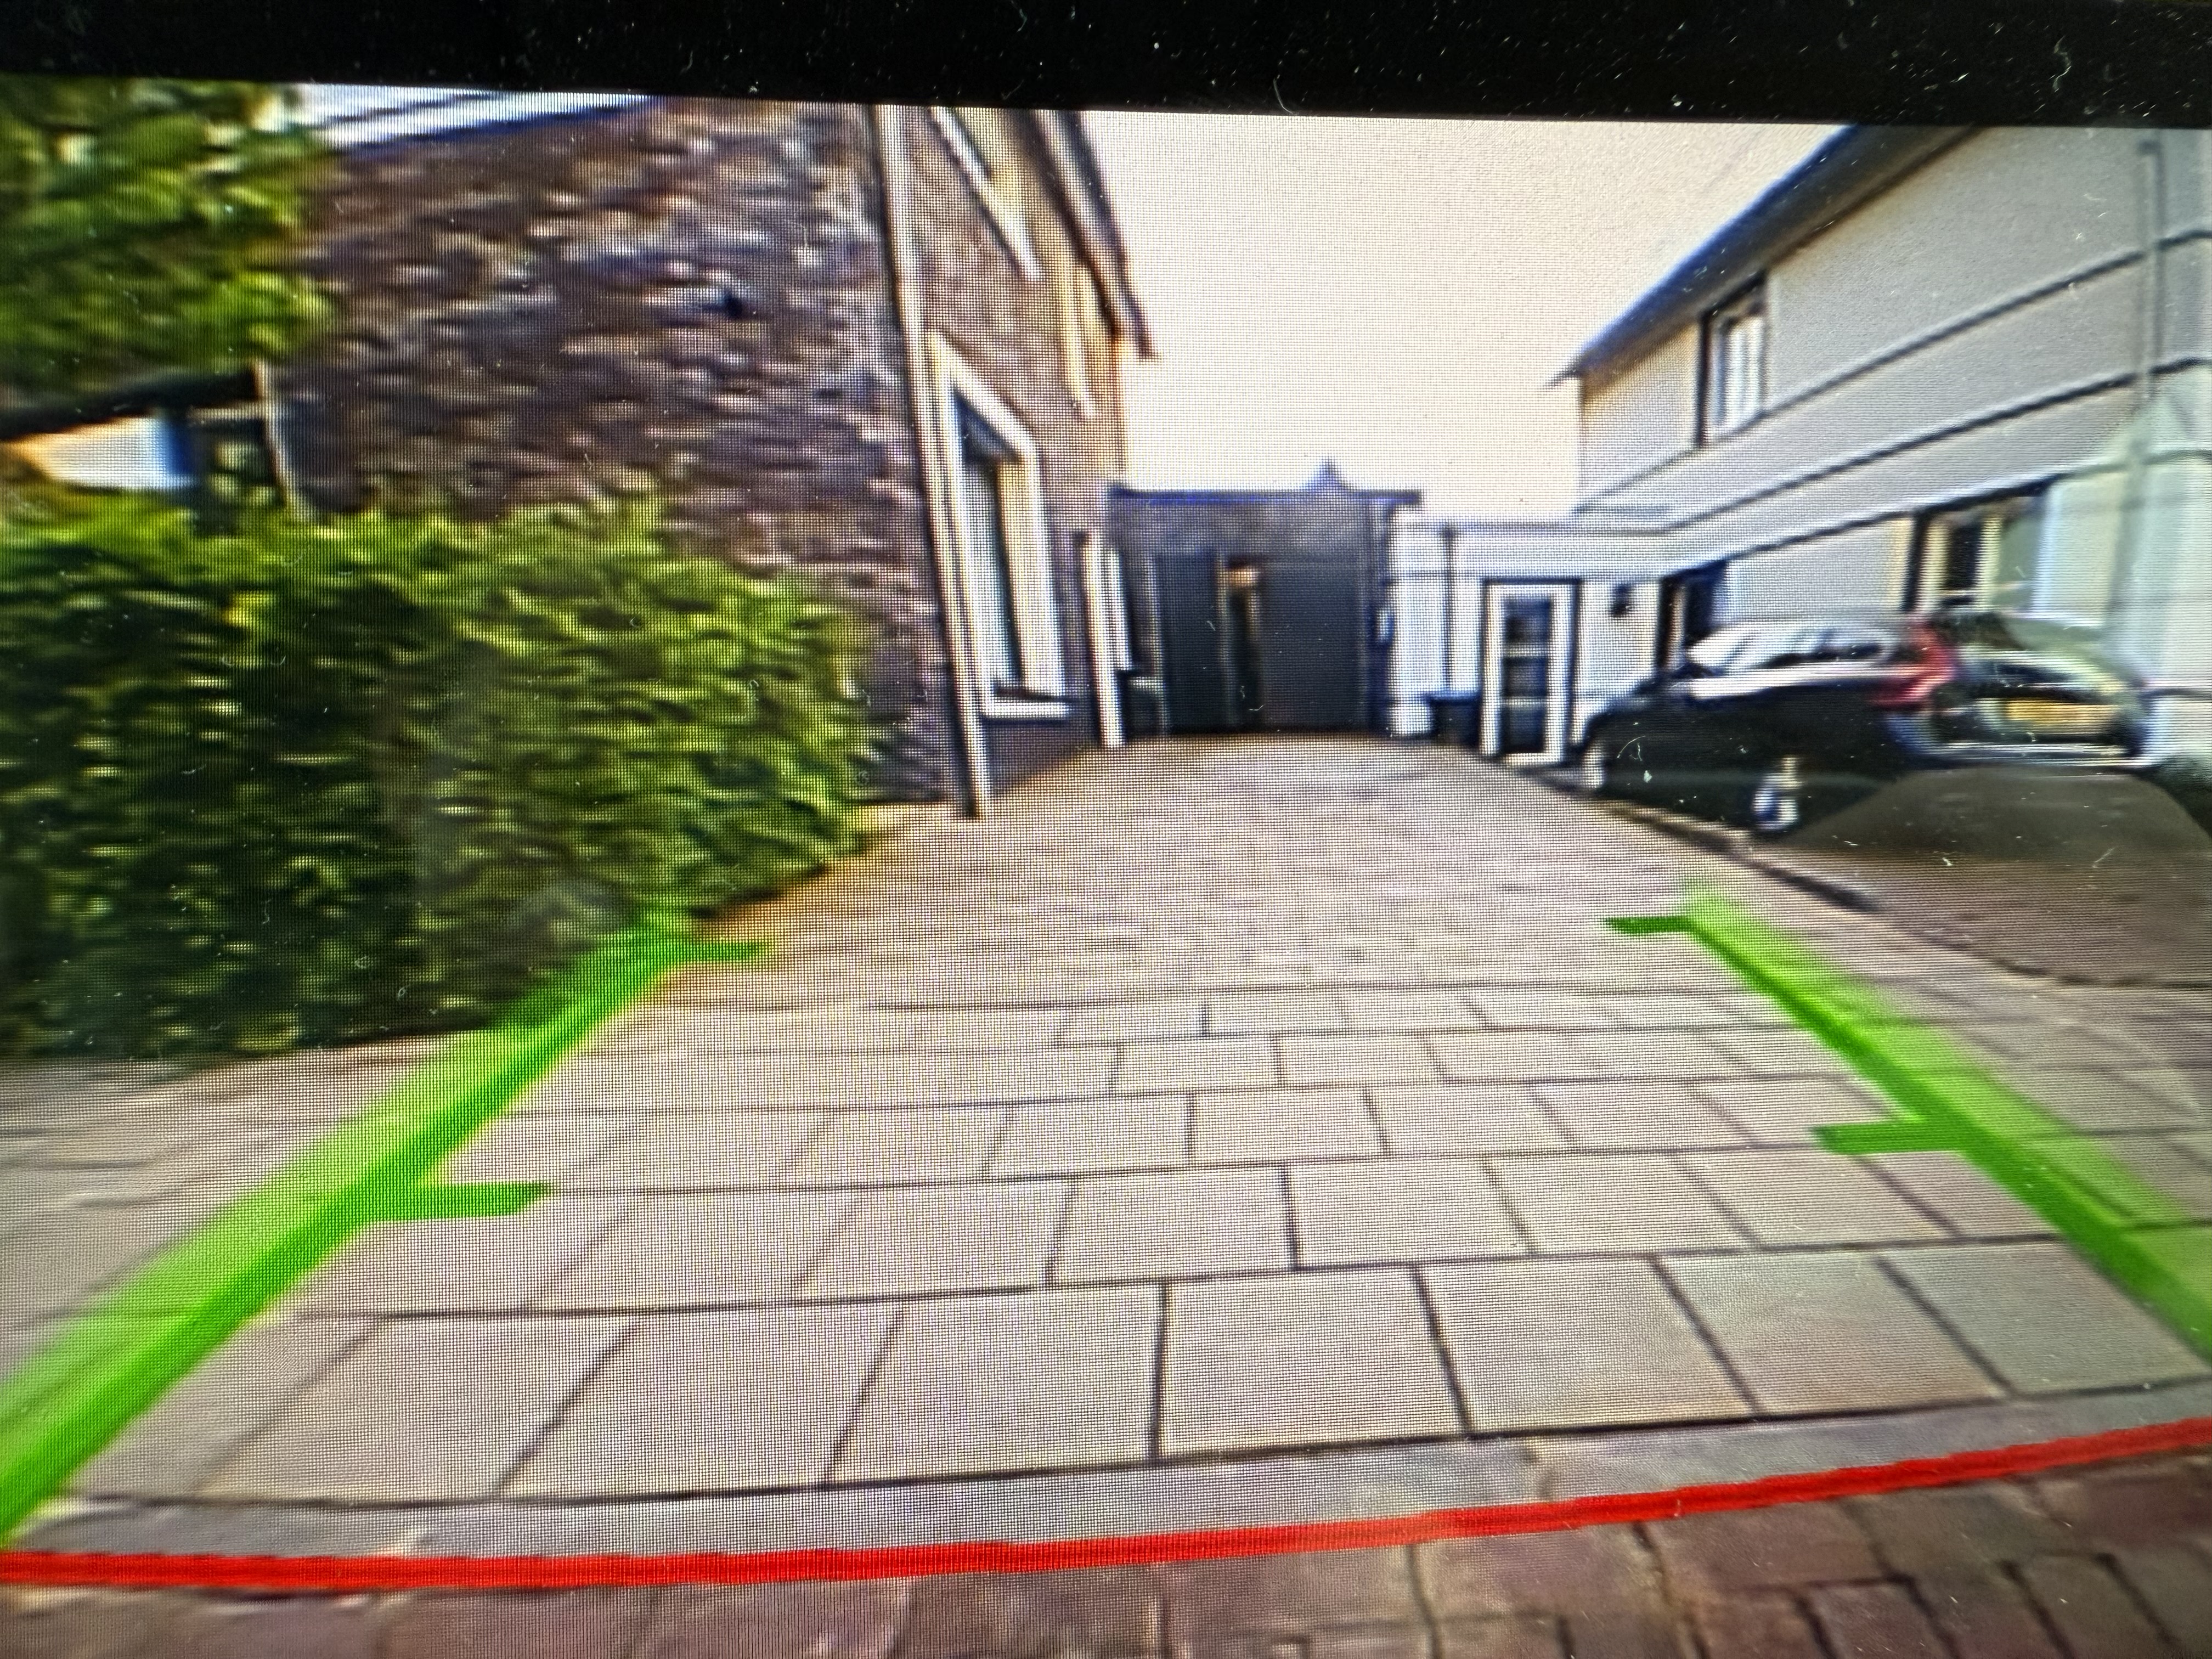
I got the new camera working, including actuating the servo motor of the logo. The quality is much better, especially in the dark. Here are two pictures before and after. Notice how the brick lines are much more detailed. The viewing angles are also different.
https://forum.obdeleven.com/thread/18480/mk7-6c-rvc-parkpilot-combination?page=1&scrollTo=78099
As a starting point, I initially coded the camera with a long coding I found
here, which was 01730201E600201F000040. I revisted the coding with the
instructions from mr-fix’s video.
For the gateway:
- Go to module 19-Gateway.
- Go to installation list.
- Check module 6C (back-up camera).
For the infotainment module (to disable low-line camera and enable the high-line camera with vehicle path lines):
- Go to module 5F-Information Electronics.
- Go to coding.
- Change byte 19, bit 4 and disable
rear-view low. - Go to adaptions.
- Change the value of
ENG122229-ENG117712-Car_Function_List_BAP_Gen2-VPS_0x0Btoactivated. - Change the value of
ENG122229-ENG117713-Car_Function_List_BAP_Gen2-VPS_0x0B_msg_bustoComfort data bus.
For the park-assist module (to inform that a camera is installed):
- Go to module 10-Park/Steer Assist.
- Go to coding.
- Change byte 2, bit 4 and enable.
- Change byte 2, bit 5 and disable.
For the camera itself:
- Go to module 6C-Backup camera.
- Go to coding.
- Change byte 0 to
01 - Change byte 1 to
33 - Change byte 2 to
03 - Change byte 4, bit 0 and disable
Trailer Control Unit (J345) NOT installed - Change byte 4, bit 1 and enable
Optical Parking Sensors (OPS) installed - Change byte 4, bit 2 and enable
ParkSteer Assist (PLA) NOT installed - Change byte 4, bit 5 and enable
DSG/Automatic Transmission installed - Change byte 4, bit 6 and enable
Swinging Logo installed - Change byte 4, bit 7 and enable
Electric Parking Brake (EPB) installed - Change byte 7 bit 0 and enable
standard view. - Change byte 7 bit 1 and enable
parallel parking view. - Change byte 7 bit 2 and enable
towing view. - Change byte 7 bit 3 and enable
fish-eye view. - Change byte 10, bit 5 and enable
Rollback recognition - Change byte 10, bit 6 and enable.
There was also an coding option to enable the puddle lights in the mirrors, (called ‘Manoevrierleuchte’), but that will not work without the 360 camera option.
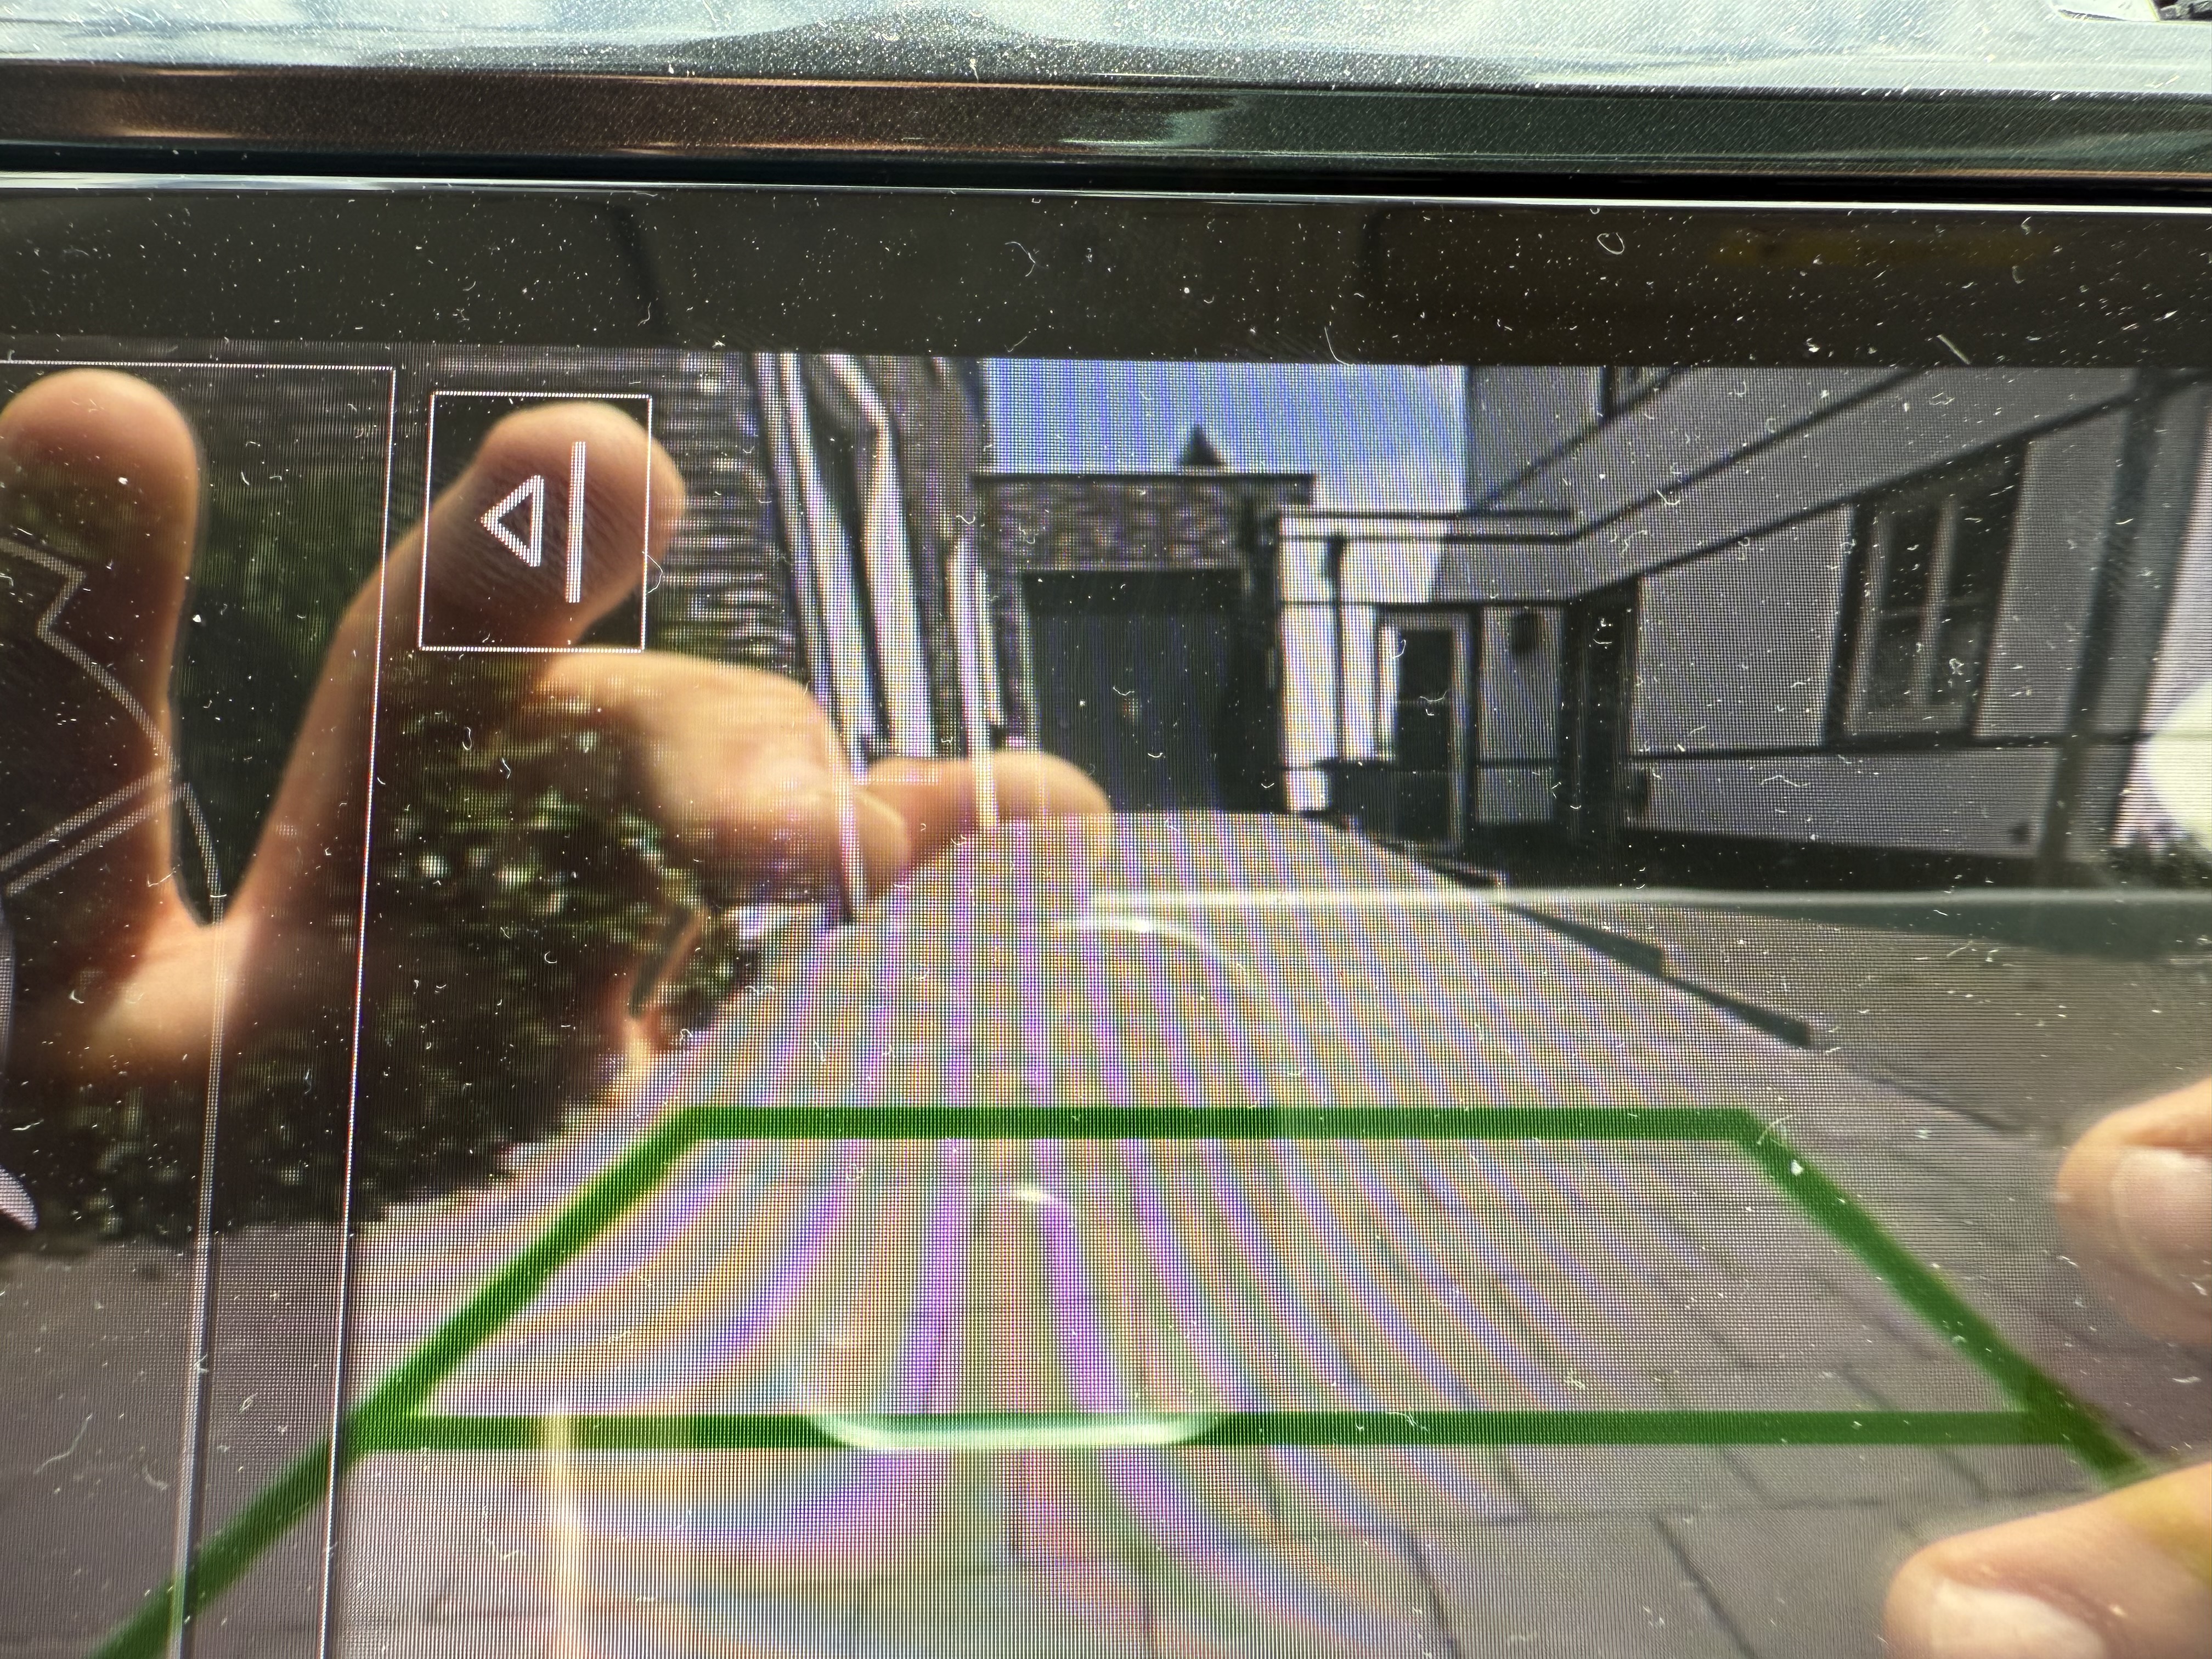
Vehicle path lines
After coding, I could not get to the vehicle path lines to work work. These
lines show which way the vehicle will go when reversing. These lines were
working for regular park pilot view (so, without the camera view). I tried
different long codings and adaptions for the camera, but none got it working.
There is also some discussion on what the value for the adaption in module 5F
of ENG122229-ENG117713-Car_Function_List_BAP_Gen2-VPS_0x0B_msg_bus should be,
but I tried them all.
Eventually, I still had the following faults and still no vehicle path lines.
                Address 6C: Back-up Cam.       Labels: 5Q0-980-556.clb
Control Module Part Number: 5Q0 980 556 B    HW: 5Q0 980 556 B
  Component and/or Version: RVC Compact   H19 0231
           Software Coding: 01330301E600001F040060
            Work Shop Code: WSC 12345 123 61029
              ASAM Dataset: EV_CamSysRVRVCPANAMQBAB 006009 (VW37)
                       ROD: EV_CamSysRVRVCPANAMQBAB.rod
                      VCID: 392F2DF919DA6C12884-806C
3 Faults Found:

10489856 - No Basic Setting
          B2010 00 [00001001] - -
          [RearView system not calibrated]
          Confirmed - Tested Since Memory Clear
             Freeze Frame:
                    Fault Priority: 5
                    Fault Frequency: 1
                    Reset counter: 248
                    Mileage: 77611 km
                    Date: 2025.05.26
                    Time: 08:44:49

                    passive

13705475 - Databus
          U1121 00 [00001001] - Missing Message
          [message Gateway_71 not received]
          Confirmed - Tested Since Memory Clear
             Freeze Frame:
                    Fault Priority: 6
                    Fault Frequency: 1
                    Reset counter: 248
                    Mileage: 77611 km
                    Date: 2025.05.26
                    Time: 08:44:50

                    passive

13705495 - Databus
          U1121 00 [00001001] - Missing Message
          [message Gateway_73 not received]
          Confirmed - Tested Since Memory Clear
             Freeze Frame:
                    Fault Priority: 6
                    Fault Frequency: 1
                    Reset counter: 248
                    Mileage: 77611 km
                    Date: 2025.05.26
                    Time: 08:44:49

                    passive
The fault about ‘message Gateway_73 not received’ could be solved by changing the coding. There are two checkboxes that are different to get it working for the e-Golf. Even though the e-Golf is an electric car, it does not have an automatic transmission. I had to uncheck that option to fix this fault. The other option I changed was the engine type, which I set to ‘electric’. This was not a fault, but it made sense for my car.
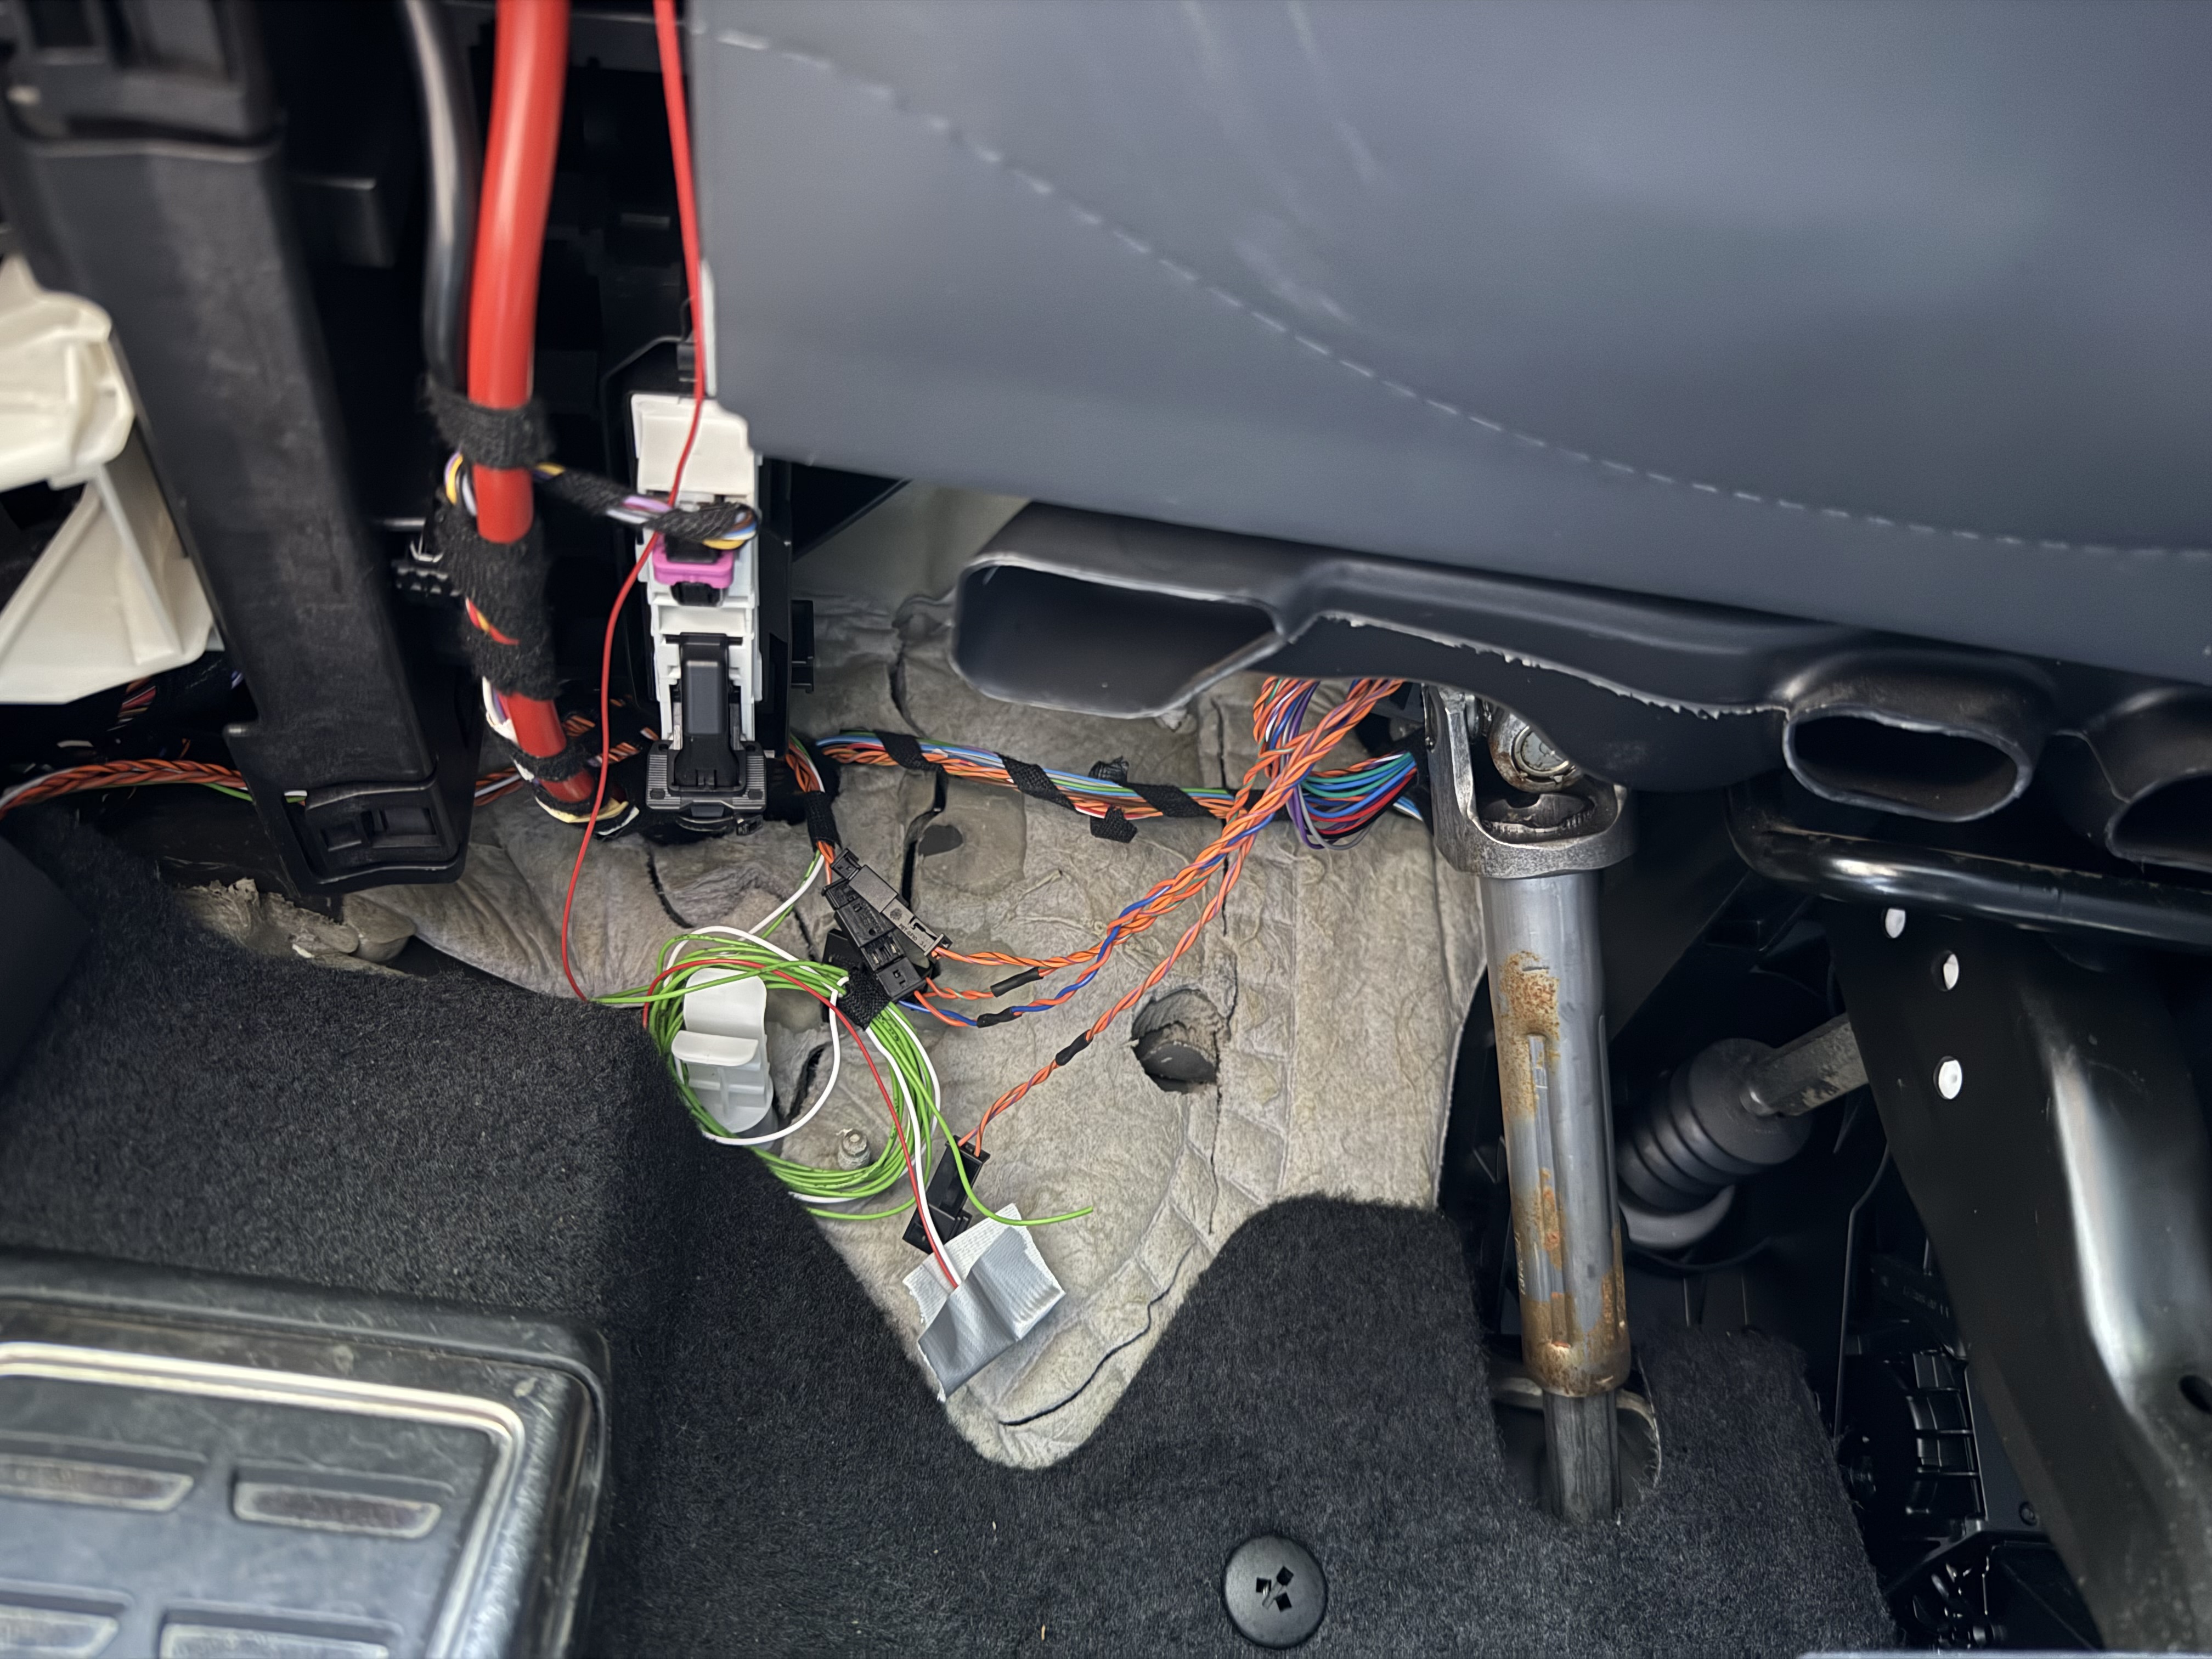
But I could not get rid of the other ‘mesage Gateway_71 not received’ fault. After a lot of debugging, I finally found it. The camera was NOT connected to the Infotainment CAN bus, but to the Comfort CAN bus. I used a gateway splitter and somehow assumed that one of the lines was the Infotainment CAN bus. The odd thing is that I could still access it via VCDS, and changing the video modes worked as well. I even prameterized it before, connecting it the same way. But it simply does not receive vehicle path information, which explains the fault.
As a quick fix, I spliced the Infotainment CAN bus wire in the adapter. I have ordered a new gateway splitter, which I will merge with the one I currently use. That way, I will have a properly crimped version.
The final long coding I ended up with was 01330301C600201F000042.
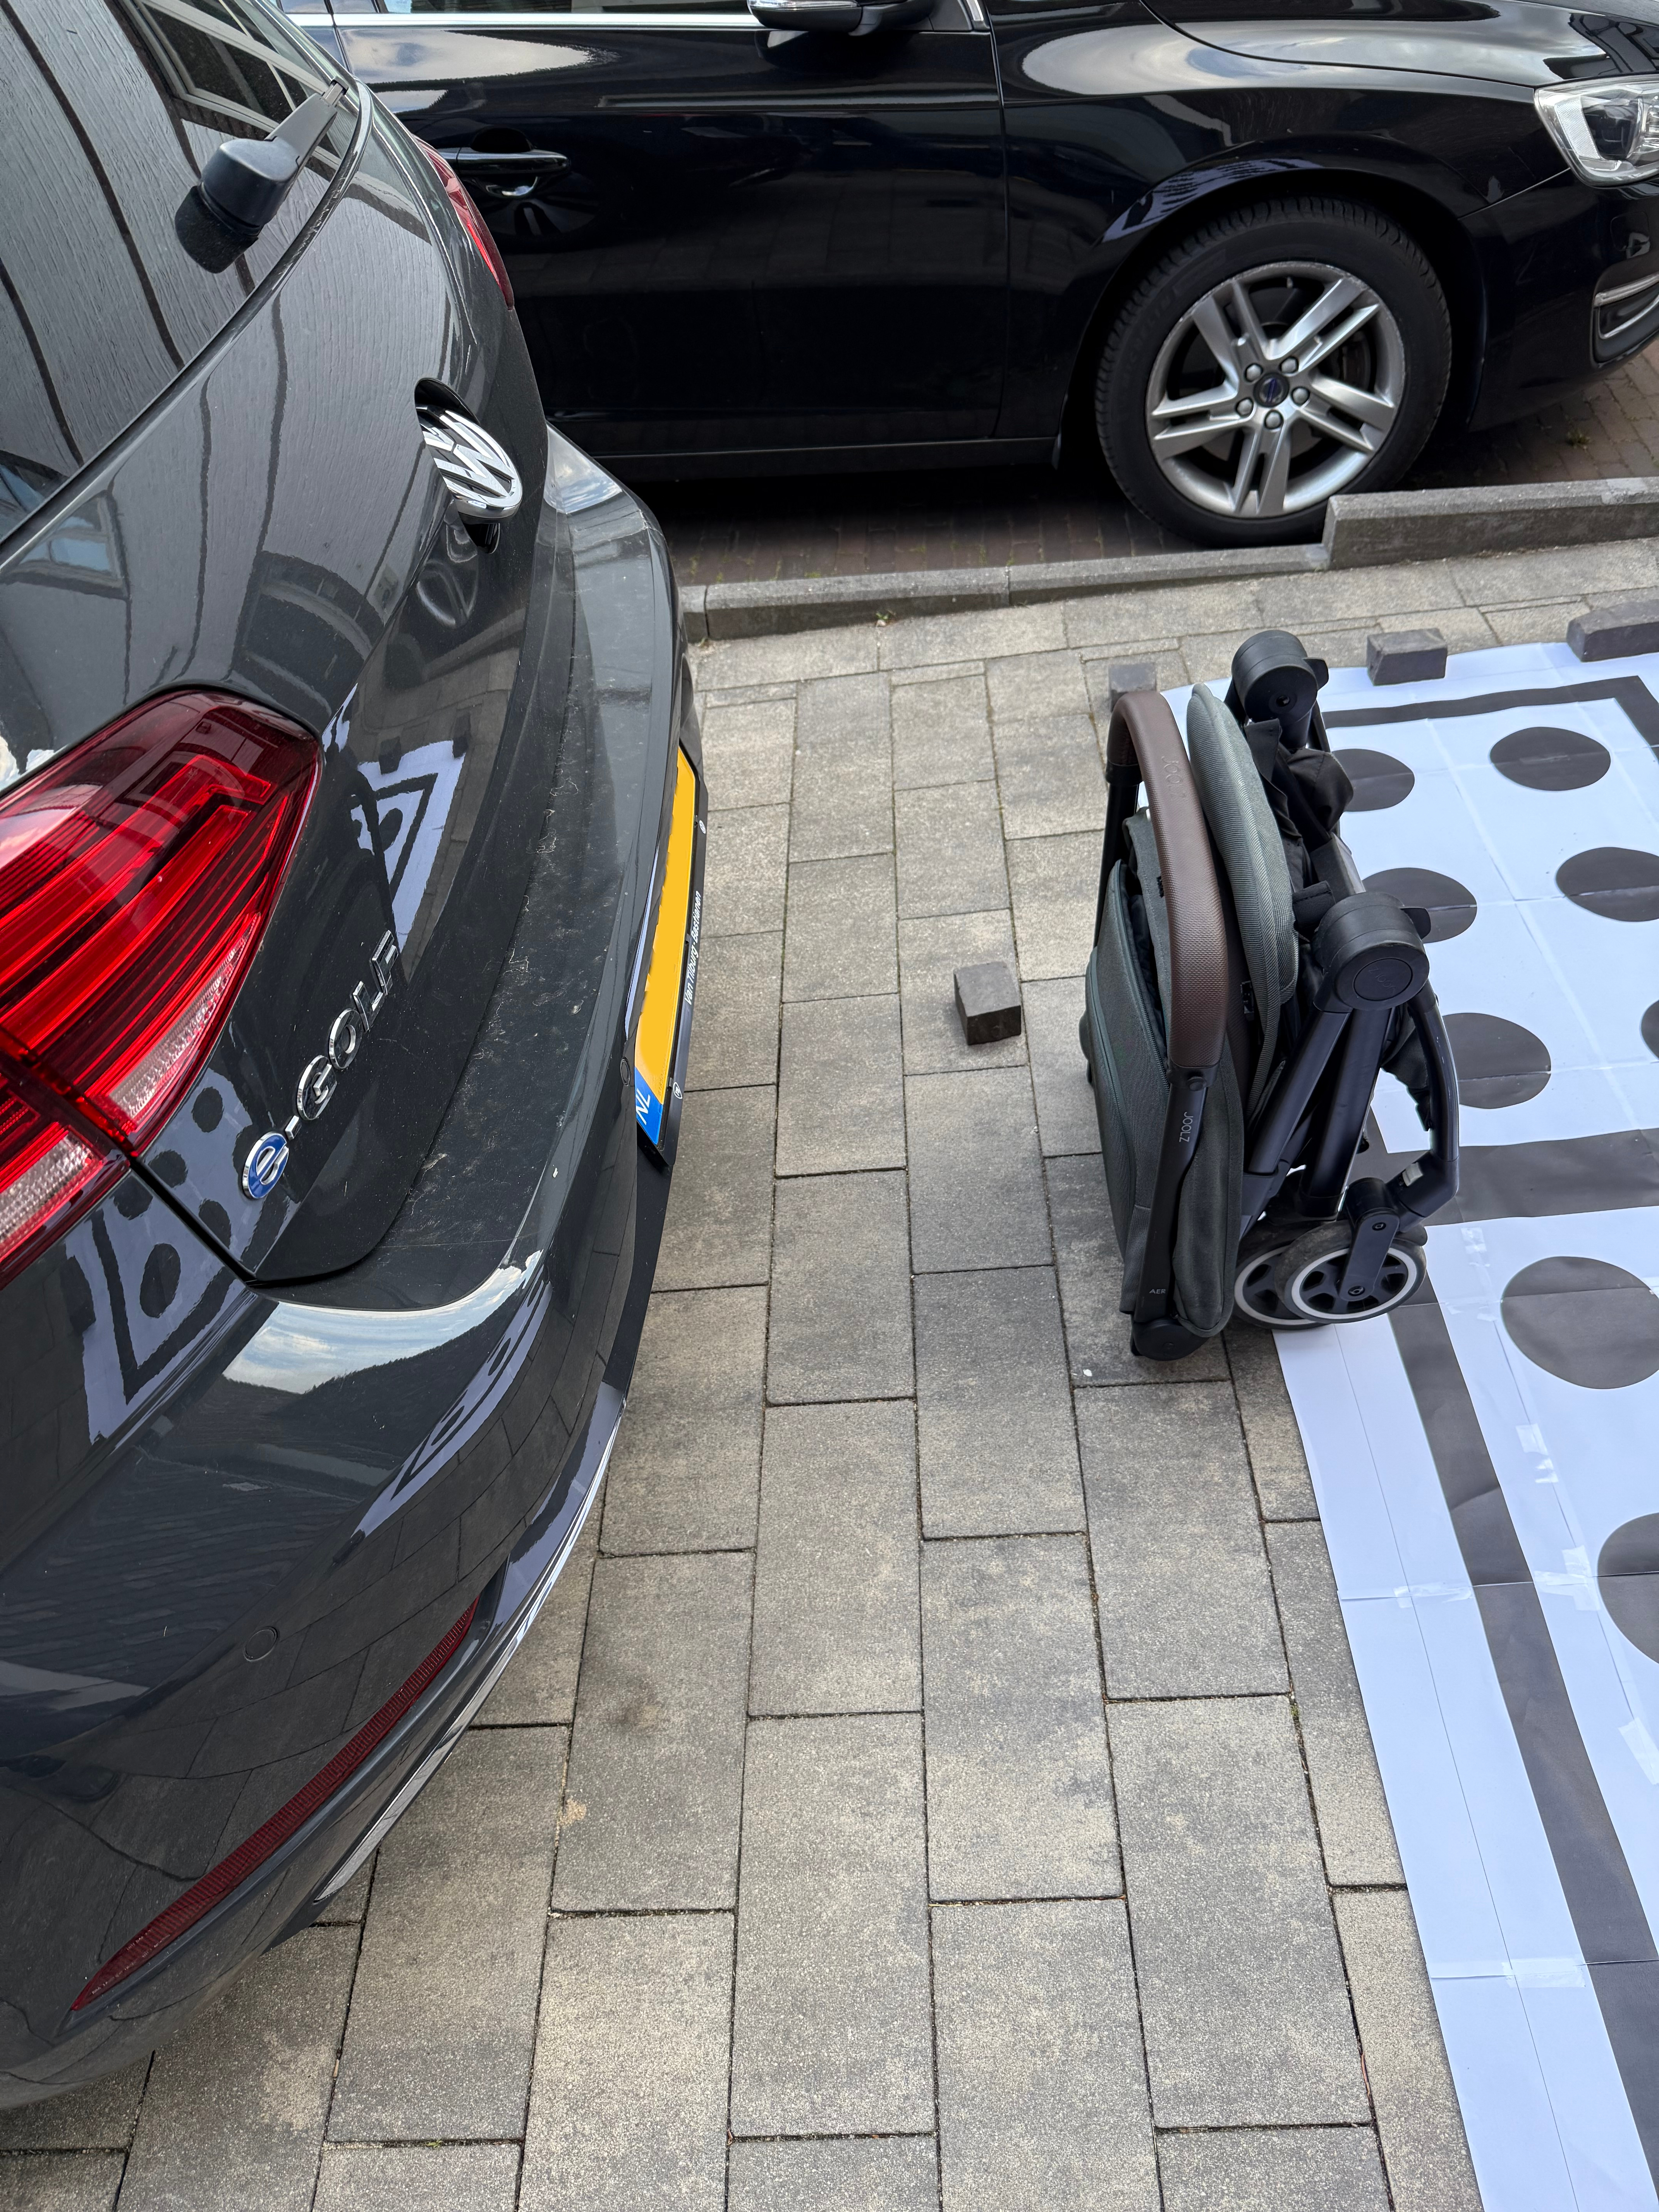
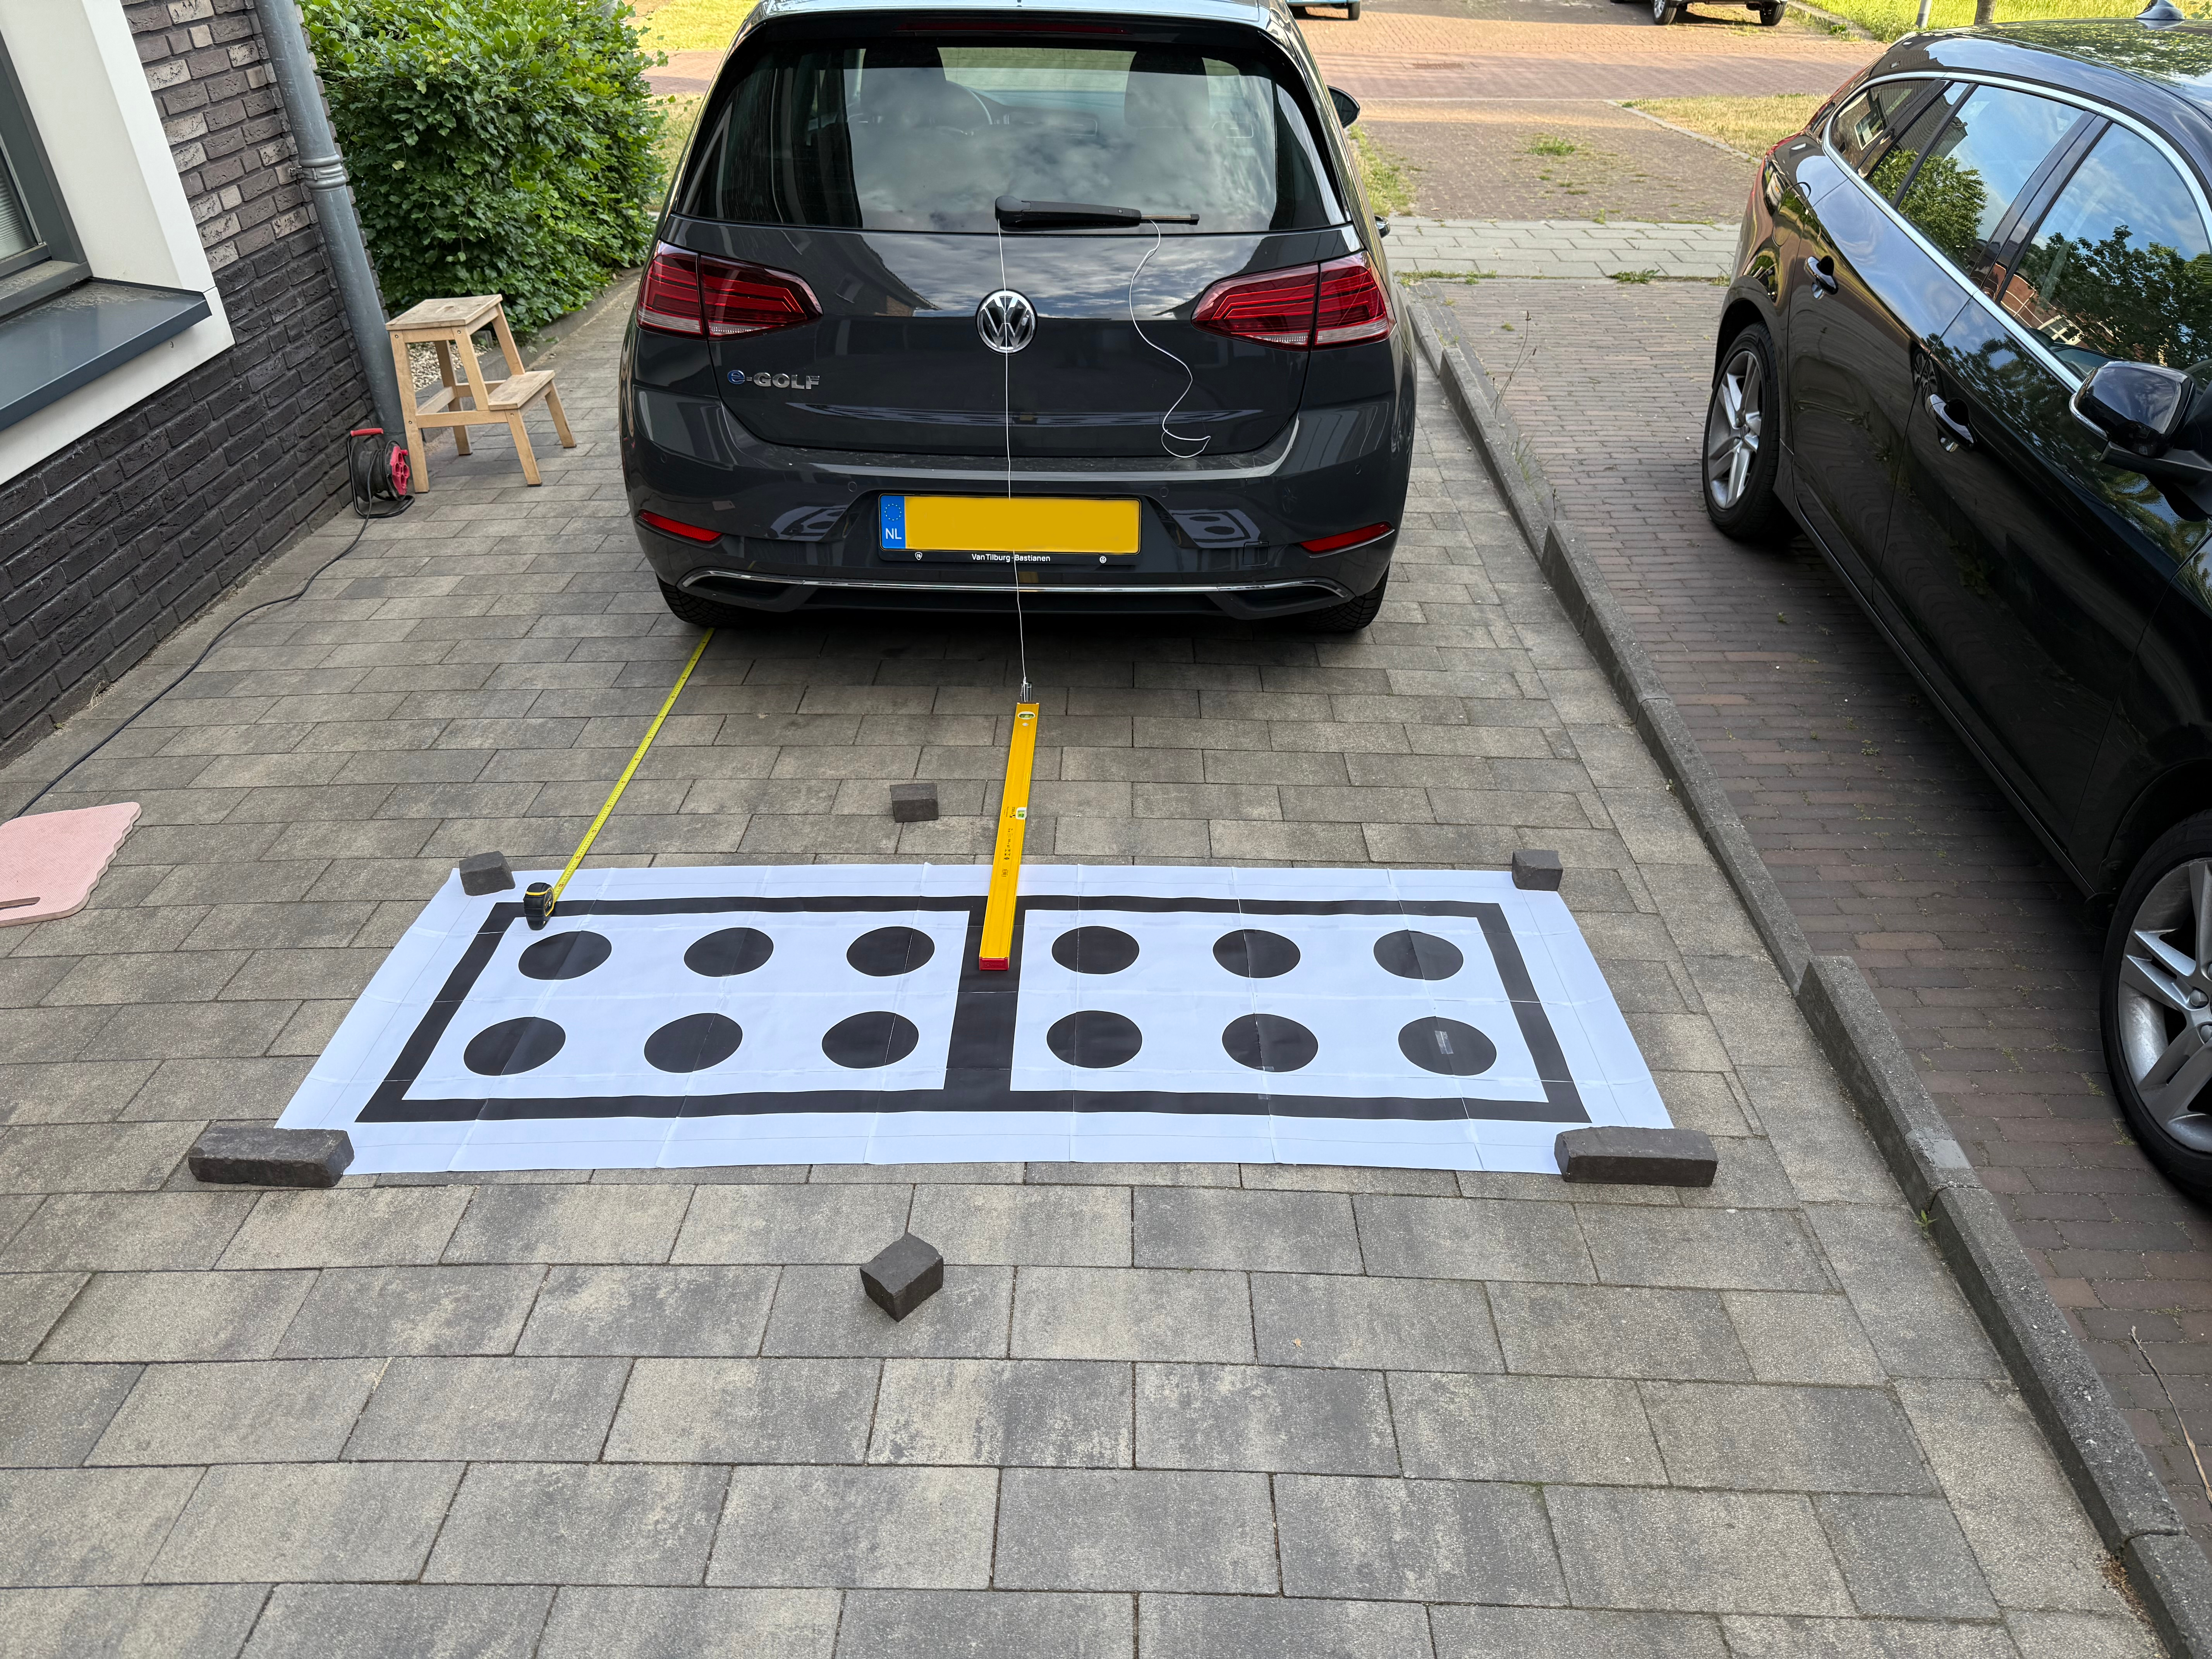
Calibration
Now that the camera is working properly, I still had to calibrate the camera. This will get rid of the ‘no basic settings’ fault. I prepared the VAS6350 calibration board already. The board’s centerline must be aligned with the logo, and it must be at equal distance from the rear wheel axle.
Because the camera was prepared with a dataset for a Passat B8, the calibration must be done in ODIS-S with the Passat B8 selected. Calibration itself is a guided function, and will ask for the camera height, the distance from the calibration target border to the rear axle and the height of the calibration target.
I used 810 mm for the height and 1 mm for the height of the calibration target. The distance to the rear axle will differ, but you need to add 415 mm according to this source, because the Passat B8 has a longer trunk.
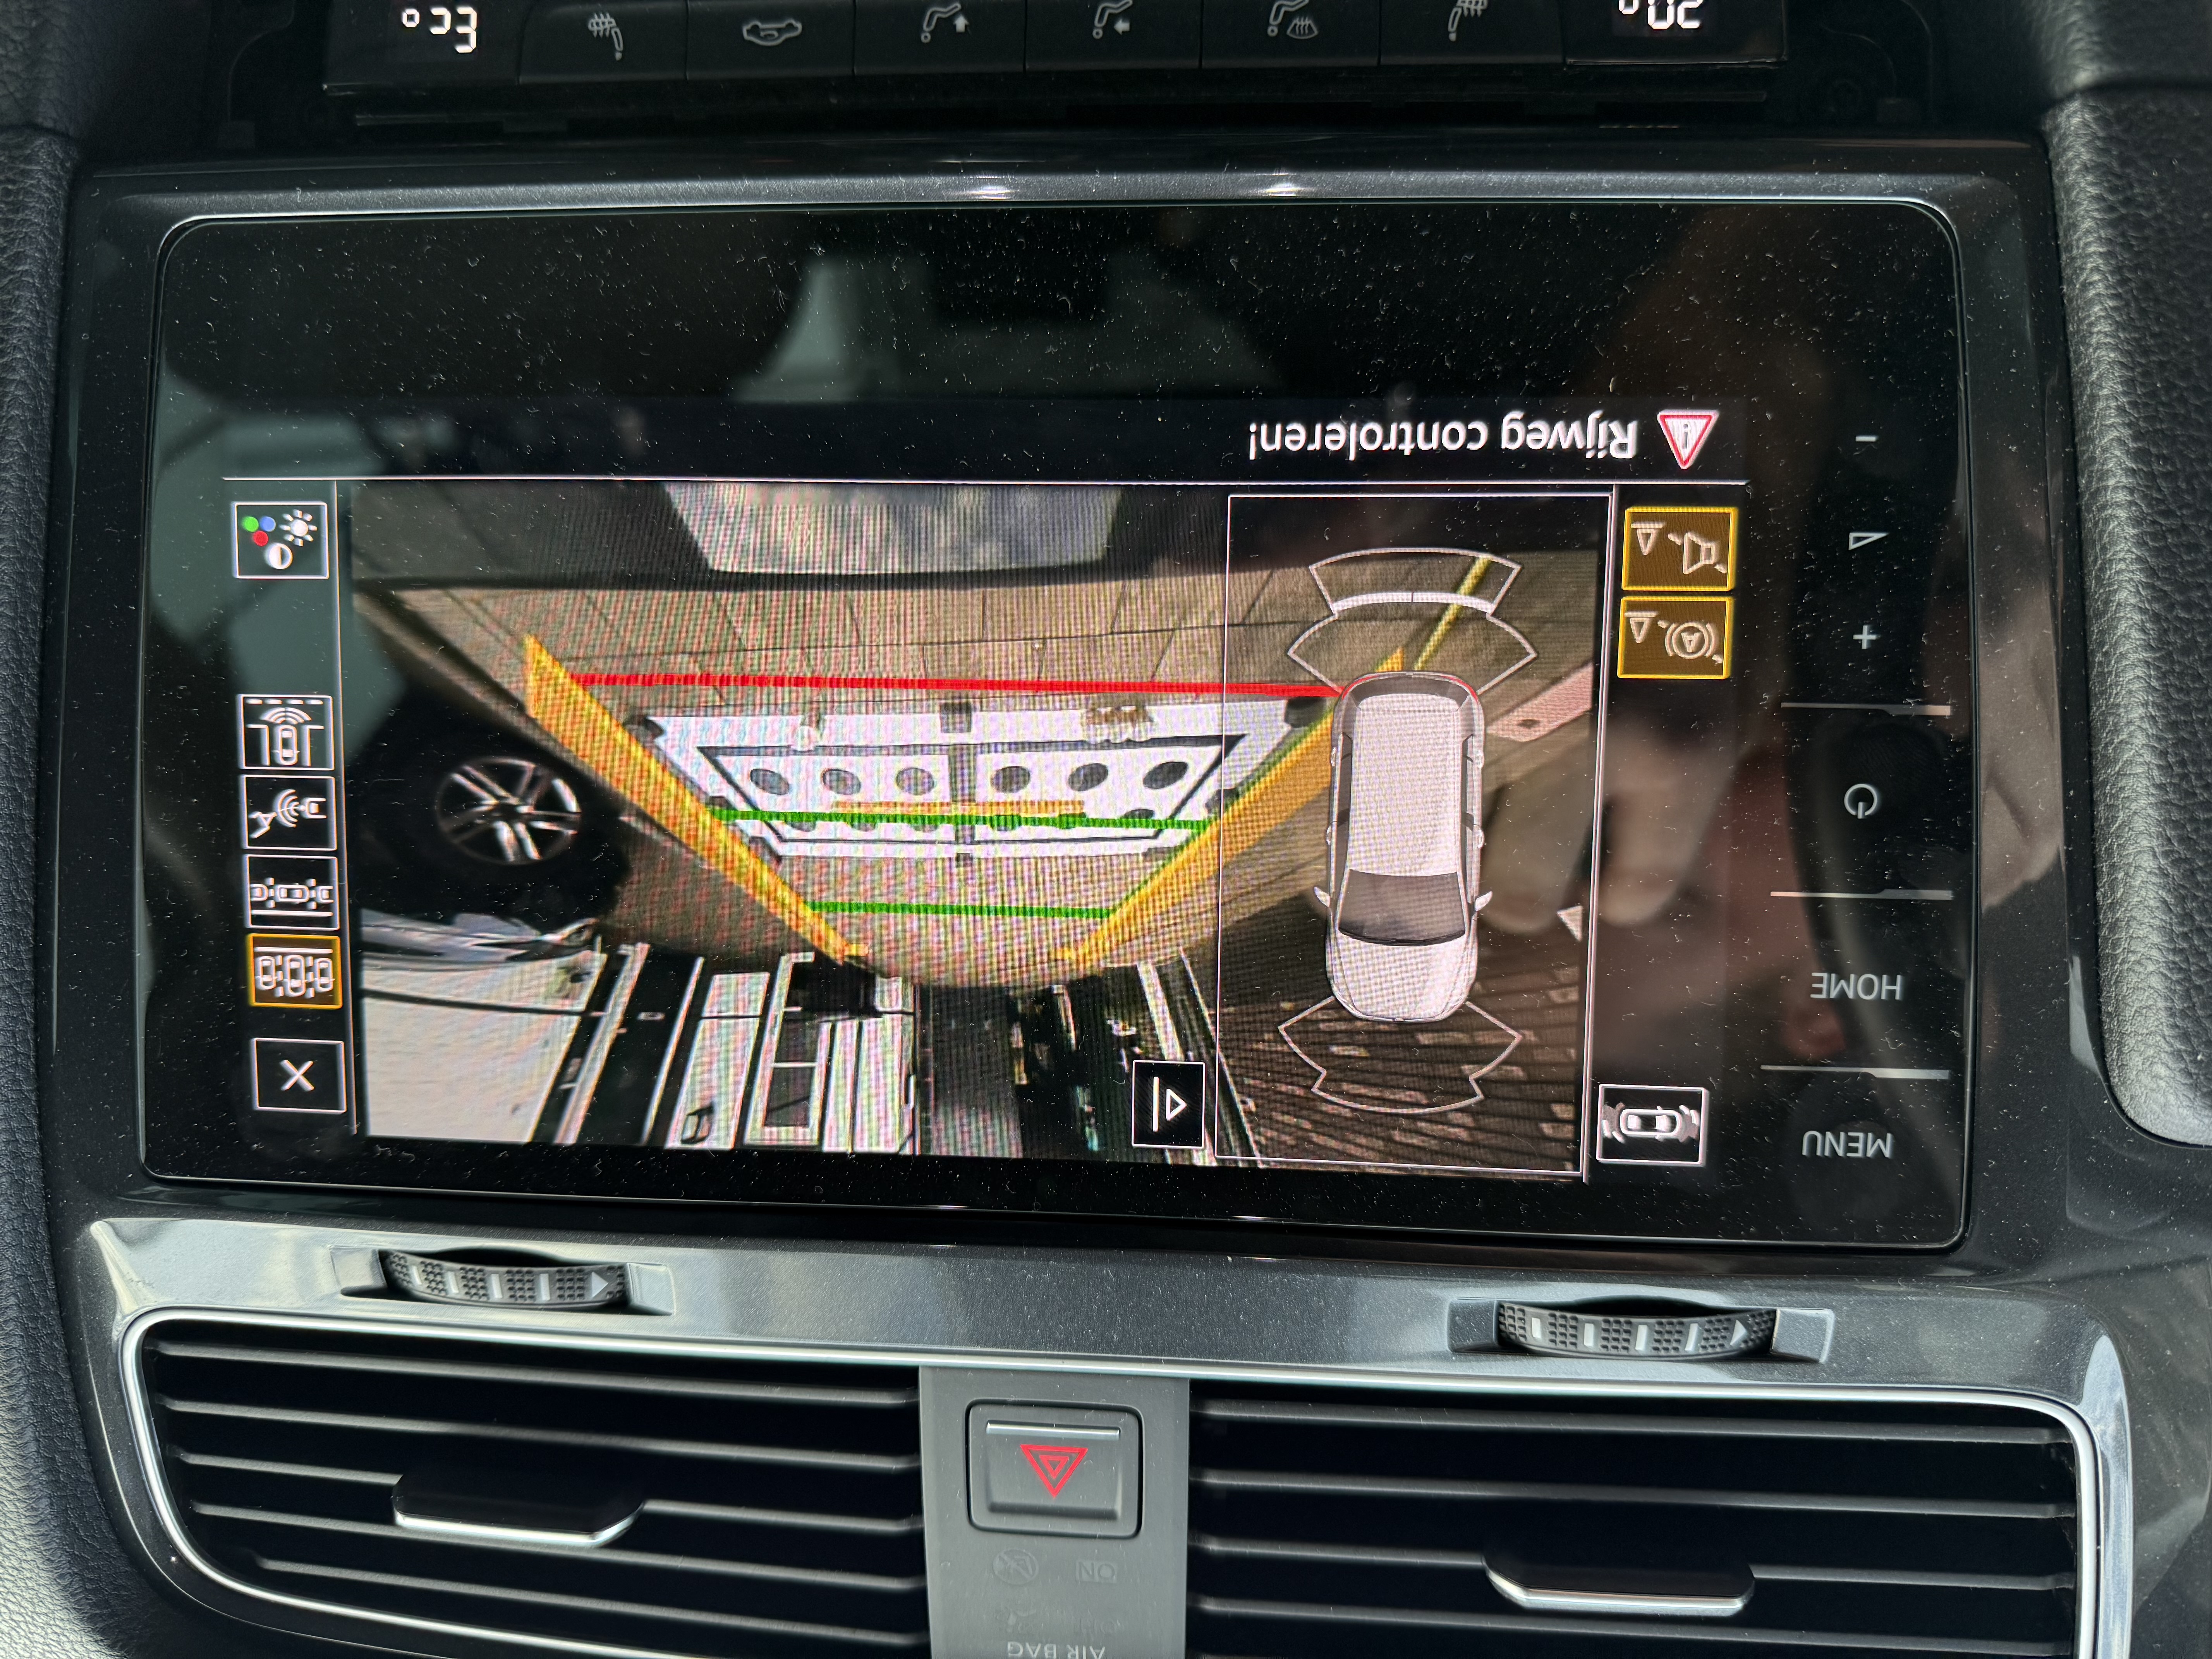
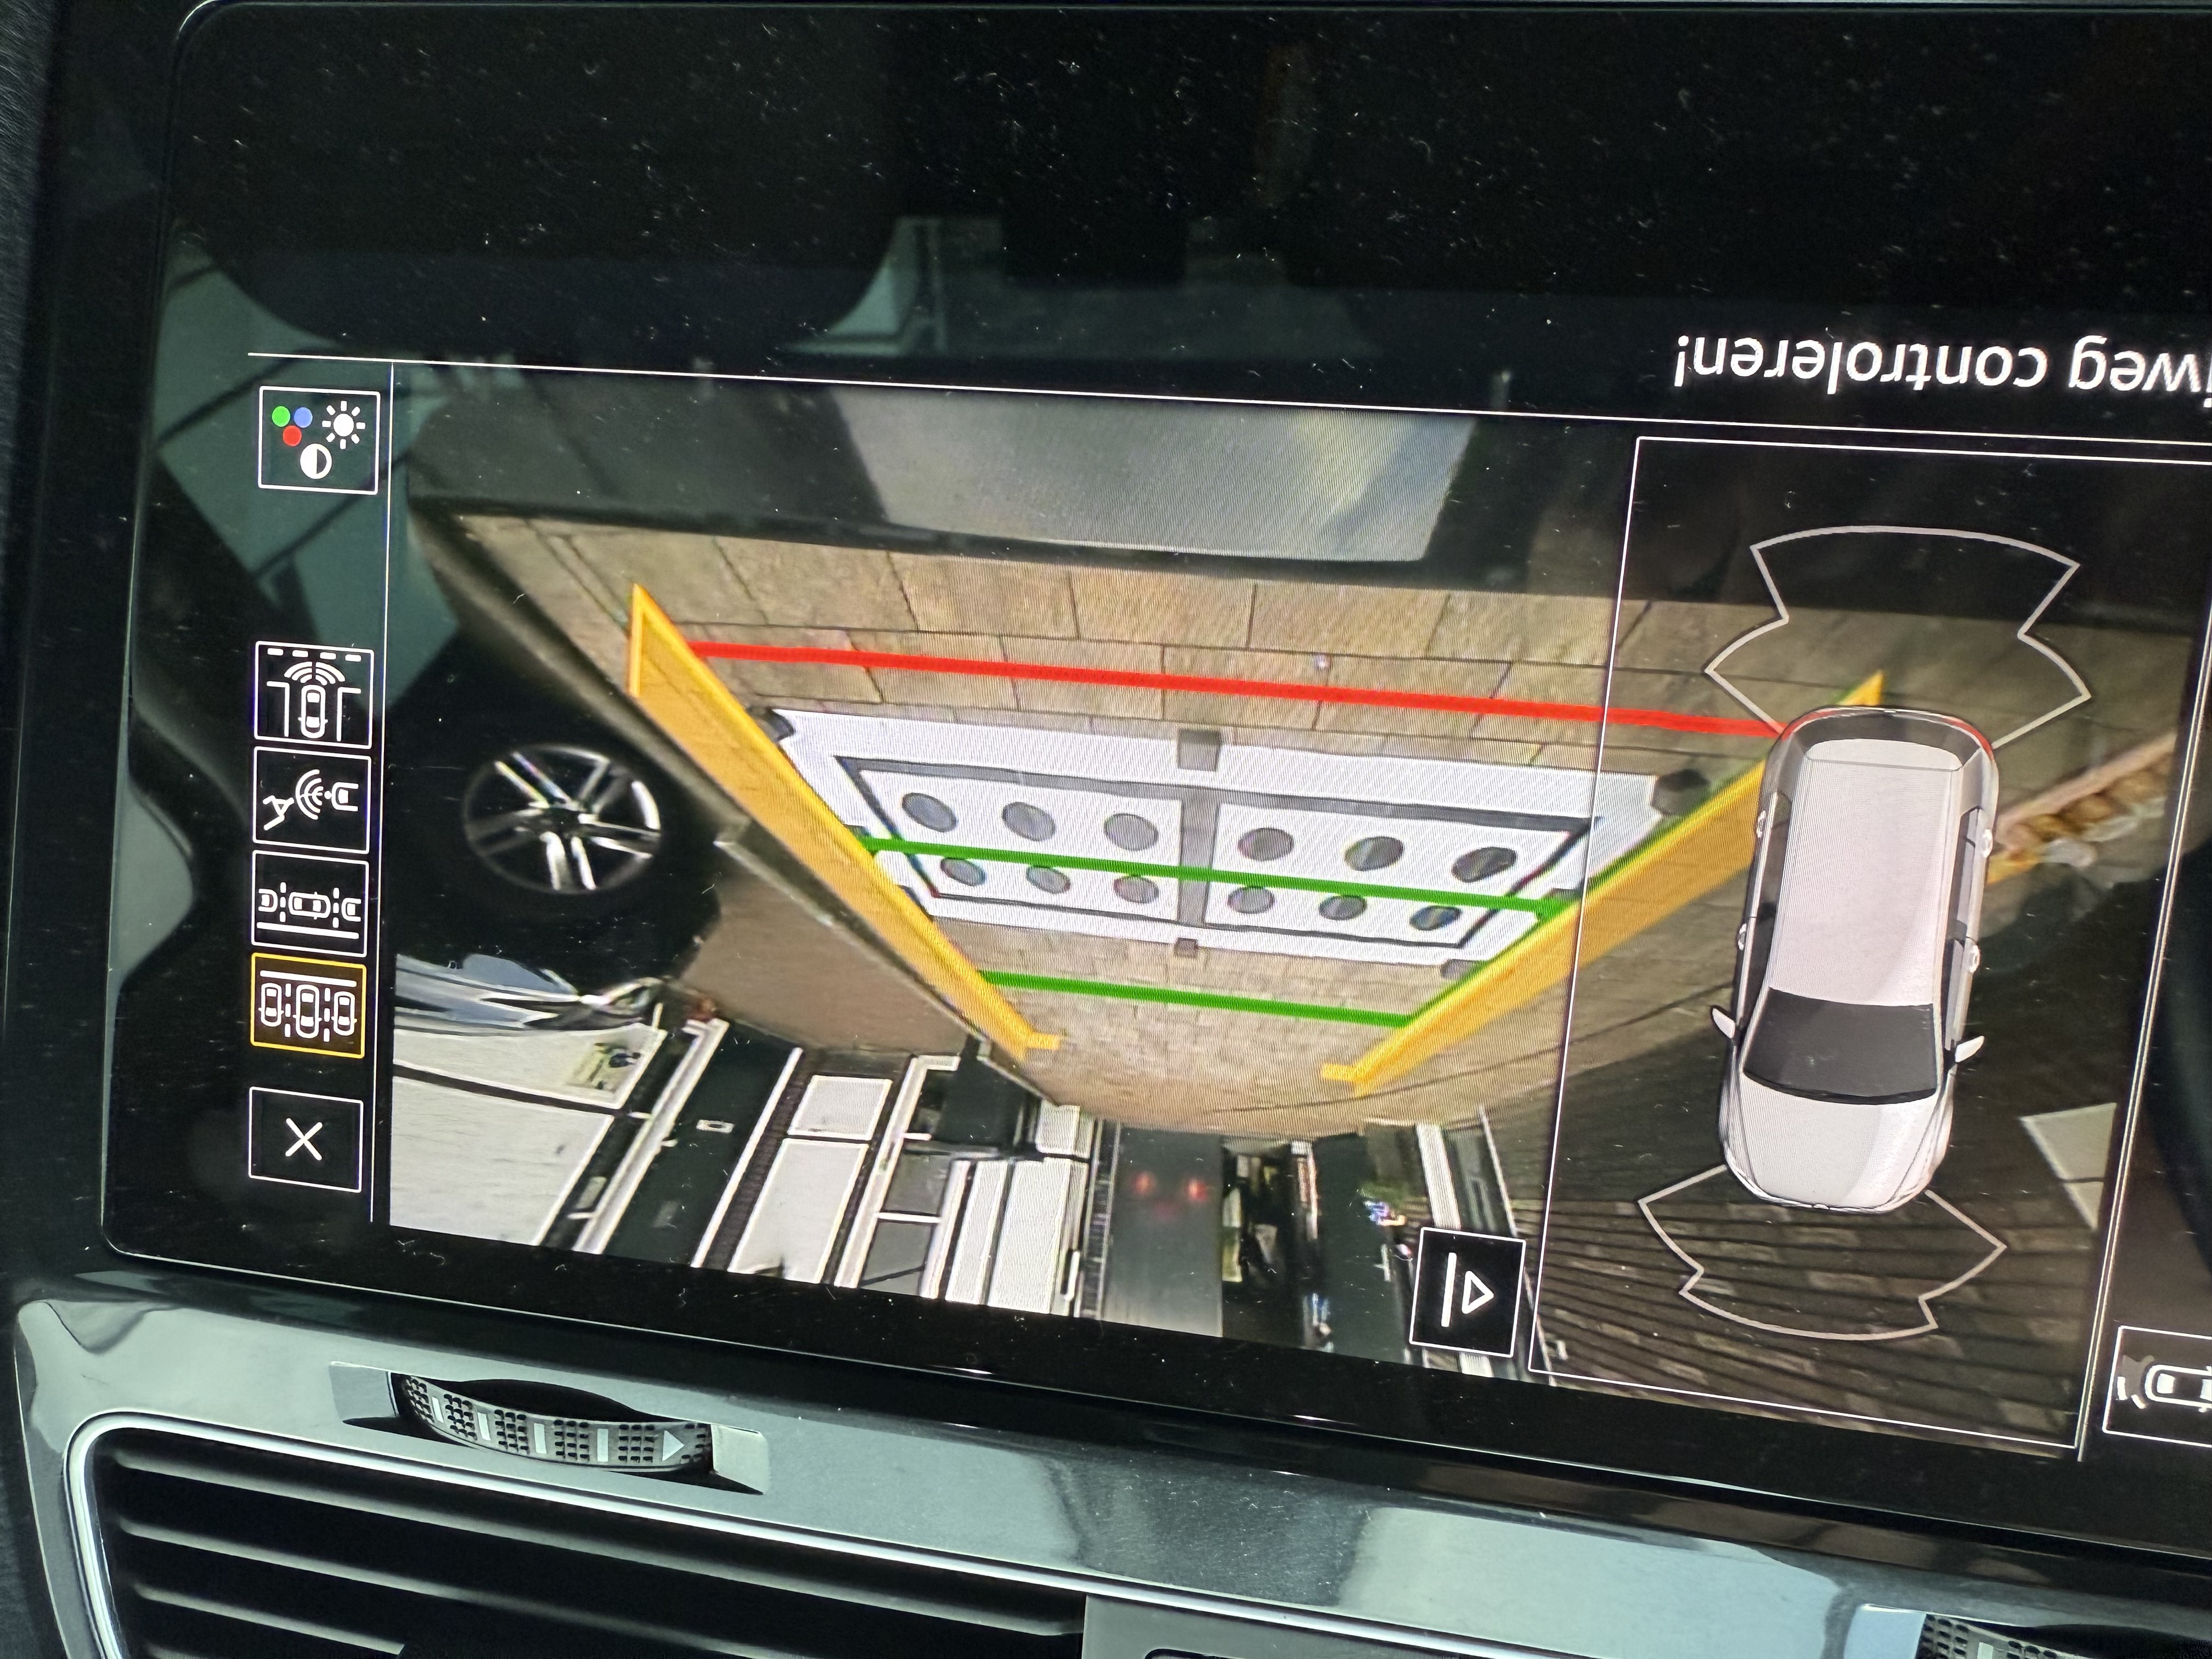
If you look at the green line close to the black circles, you can clearly see that it compensated for misalignment by rotating the camera image.
I will probably redo the calibration some day. Today was a windy day, and I did not calibrate it on a flat surface. The result is good enough for now and the fault in the camera module is gone. I checked the red stop line, and it at a comfortable distance.