A faulty stick
When I bought this car, I did not sign up for so many problems. Yes, the car is not new, but it should not have all these troubles. Previously, it was a short to ground, some water ingress in the bumper, more water ingress in the trunk lid and a faulty charge port. This time, it is another unforeseen issue with the turn signal stick.
This week, the weather has been extremely snowy and cold. Cars don’t like these circumstances: plastics get brittle, rubber parts freeze and electronics can misbehave. I noticed that when I used the turn signals, the car gave a warning in the instrument cluster that the button for the driver assistance systems was faulty. This button is located on the end of the turn signal stick, and I barely use it.
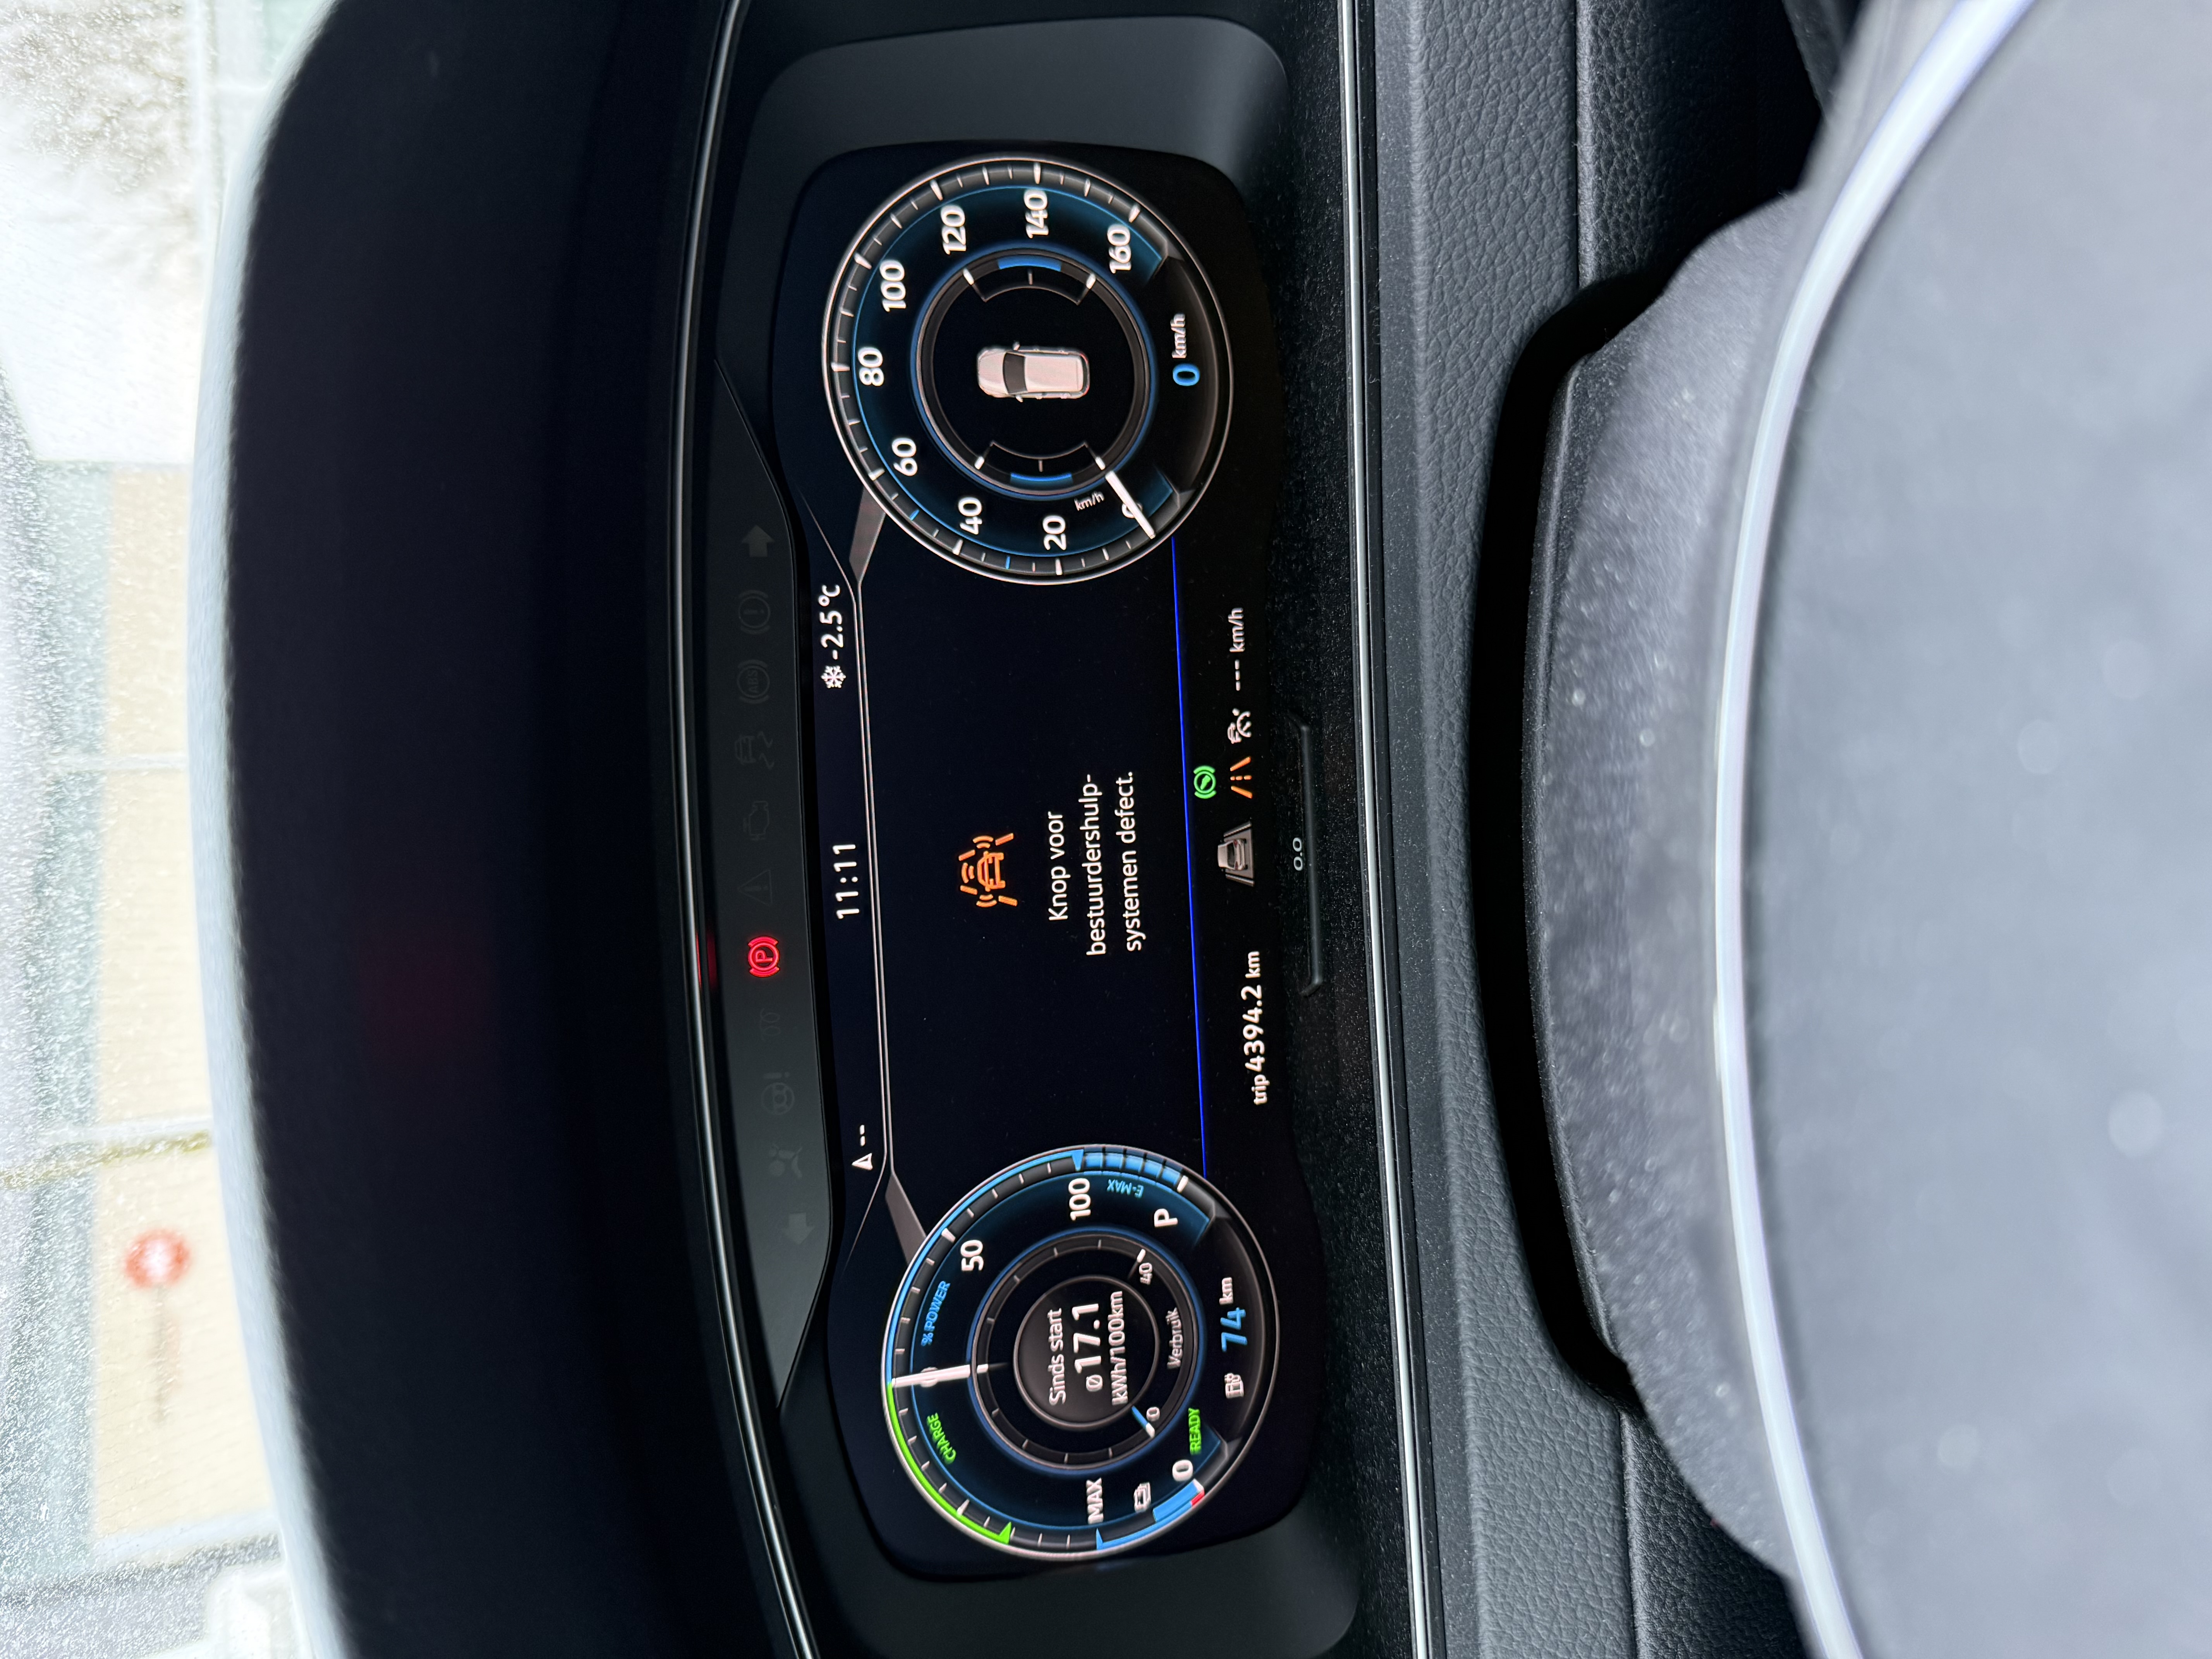
The fault was intermittent: it kept appearing, then disappearing, but every time after using the turn signals. I did an auto scan using VCDS, and this showed me that there was an open circuit in the steering column control module. Using the ‘advanced measuring values’ function, I could see the status of the connection change from ‘operational’ to ‘malfunctioning’, while wiggling the turn signal stick. This confirmed that the problem was in the turn signal stick.
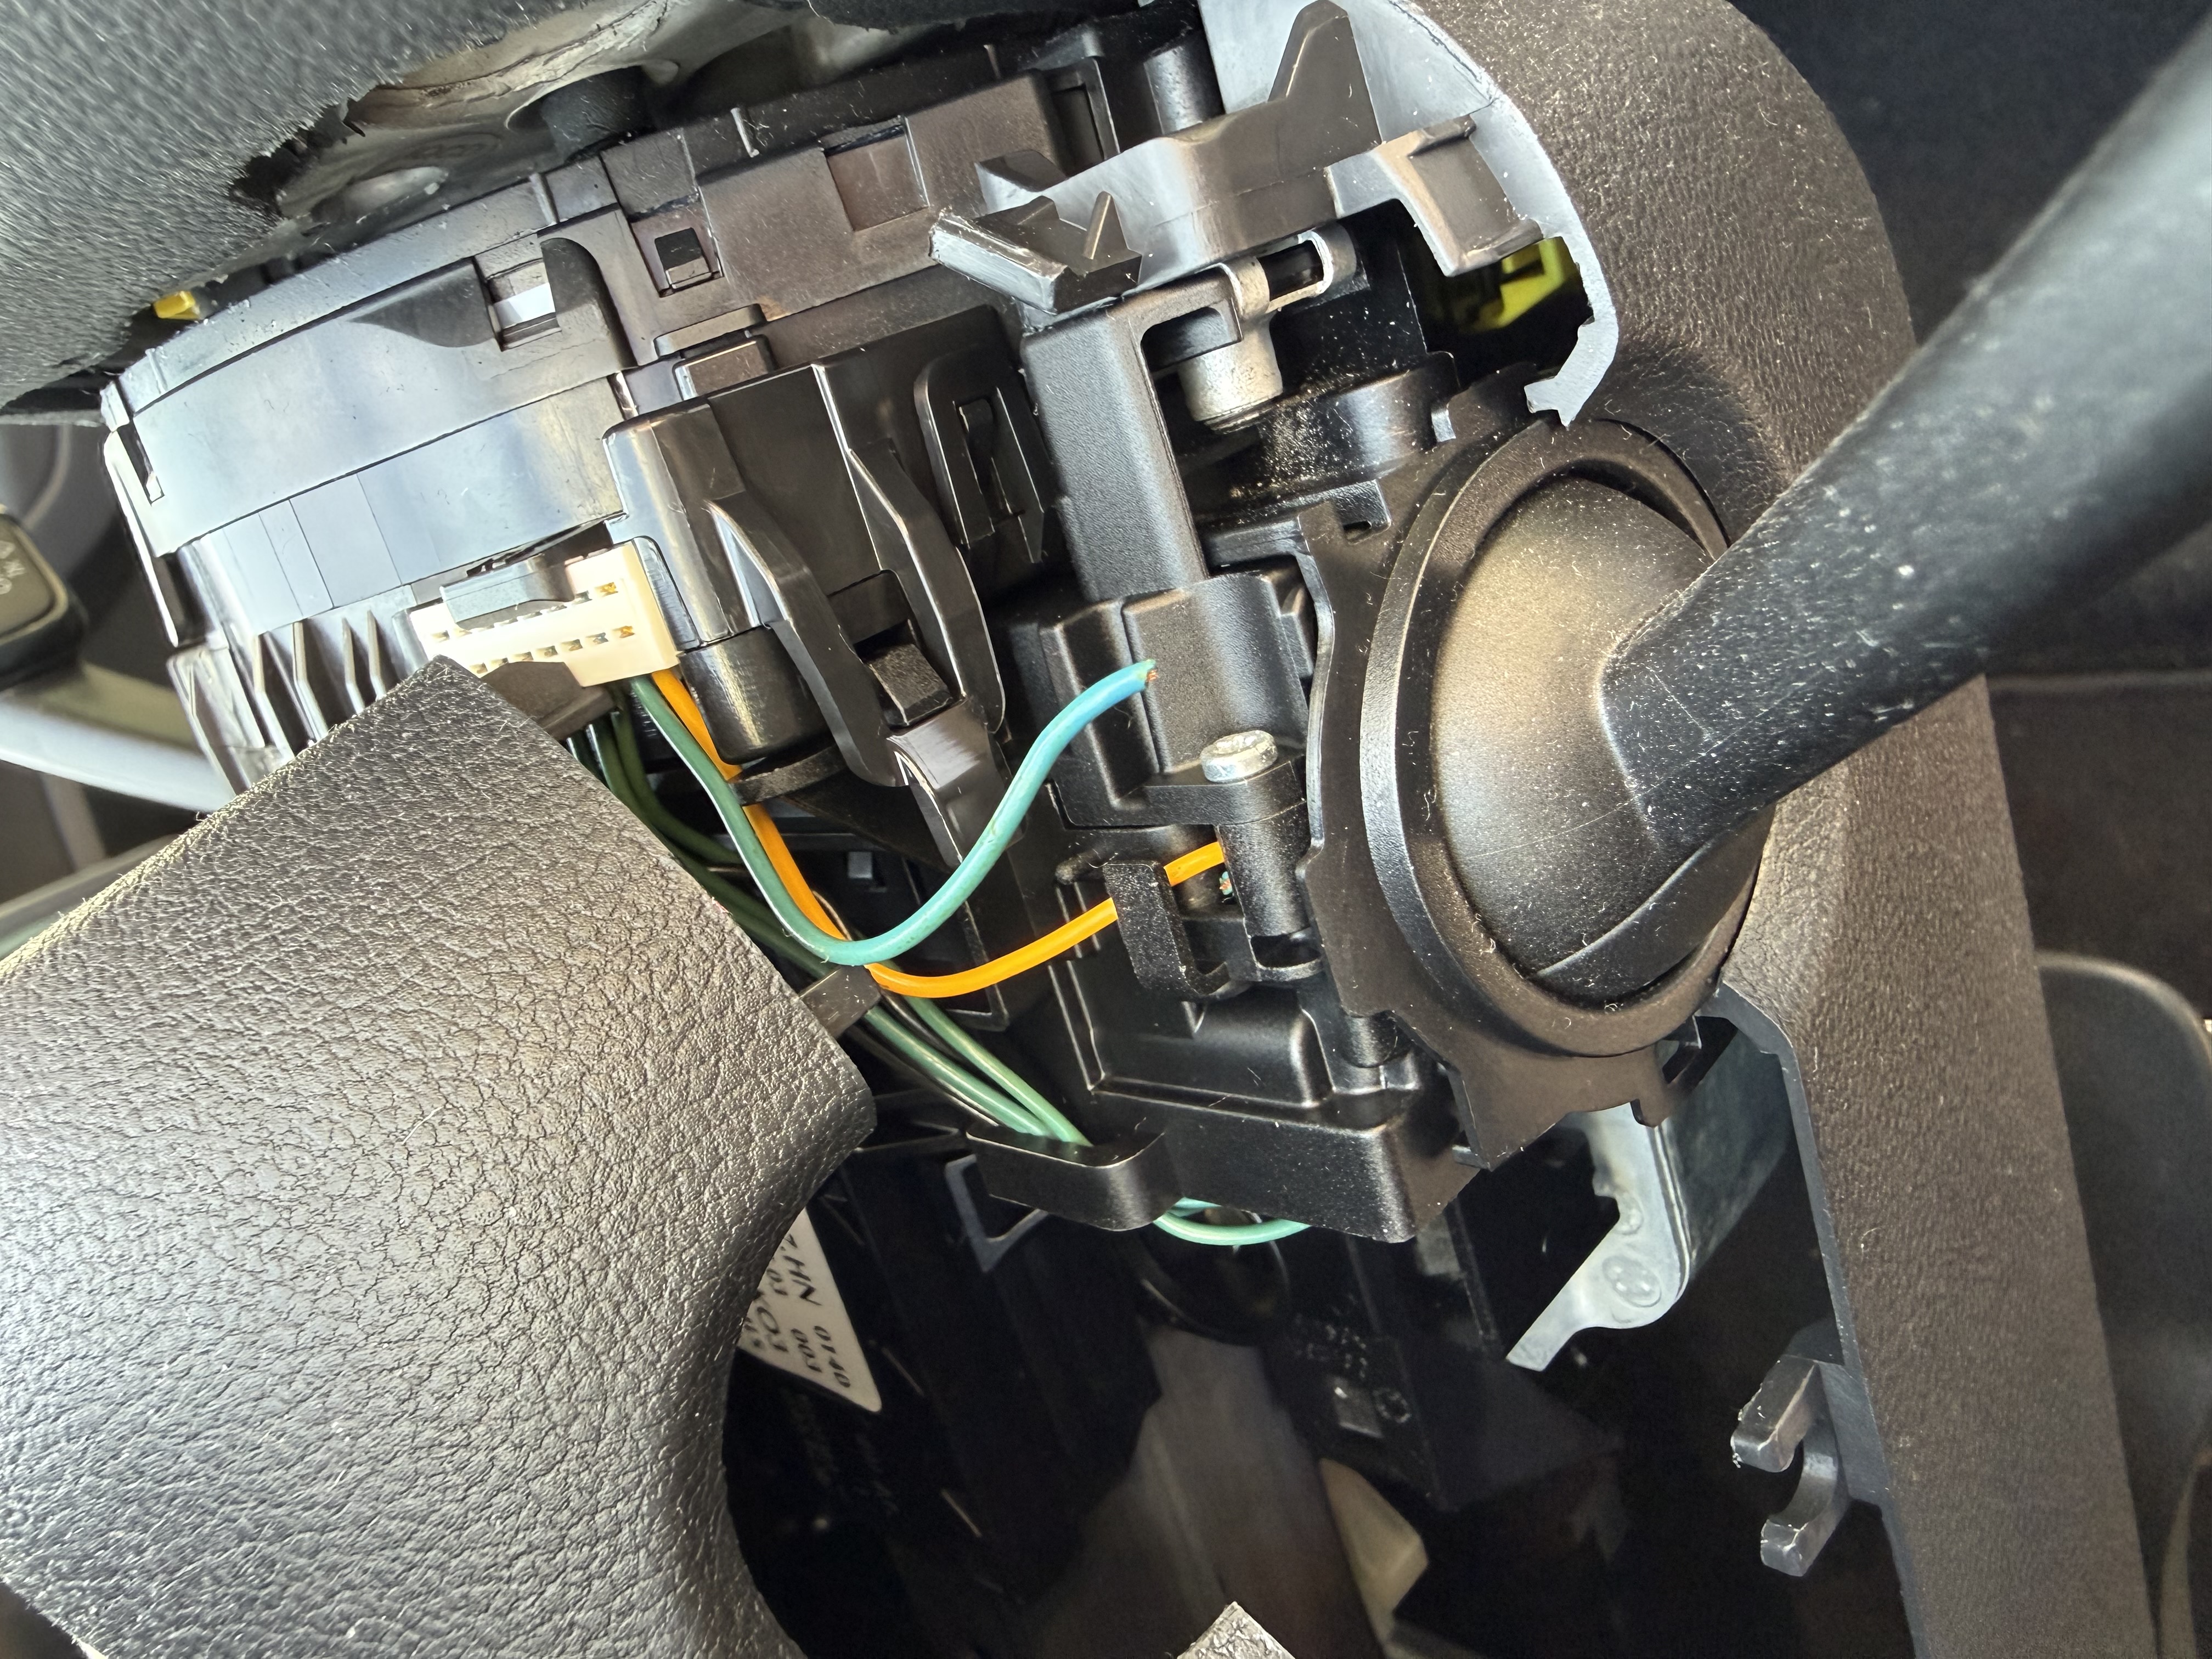
I decided to remove the trim around the steering column to get access to the turn signal stick. I only had to remove the top part of the trim, which is only clipped in place. Removing this, revealed the wires from the turn signal stick going into the steering column control module. And indeed, I immediately saw a broken wire. When I pulled the turn signal, you could see the blue wire move, so the failure mode is probably wire fatigue. This proves that this car is definitely not a BMW.
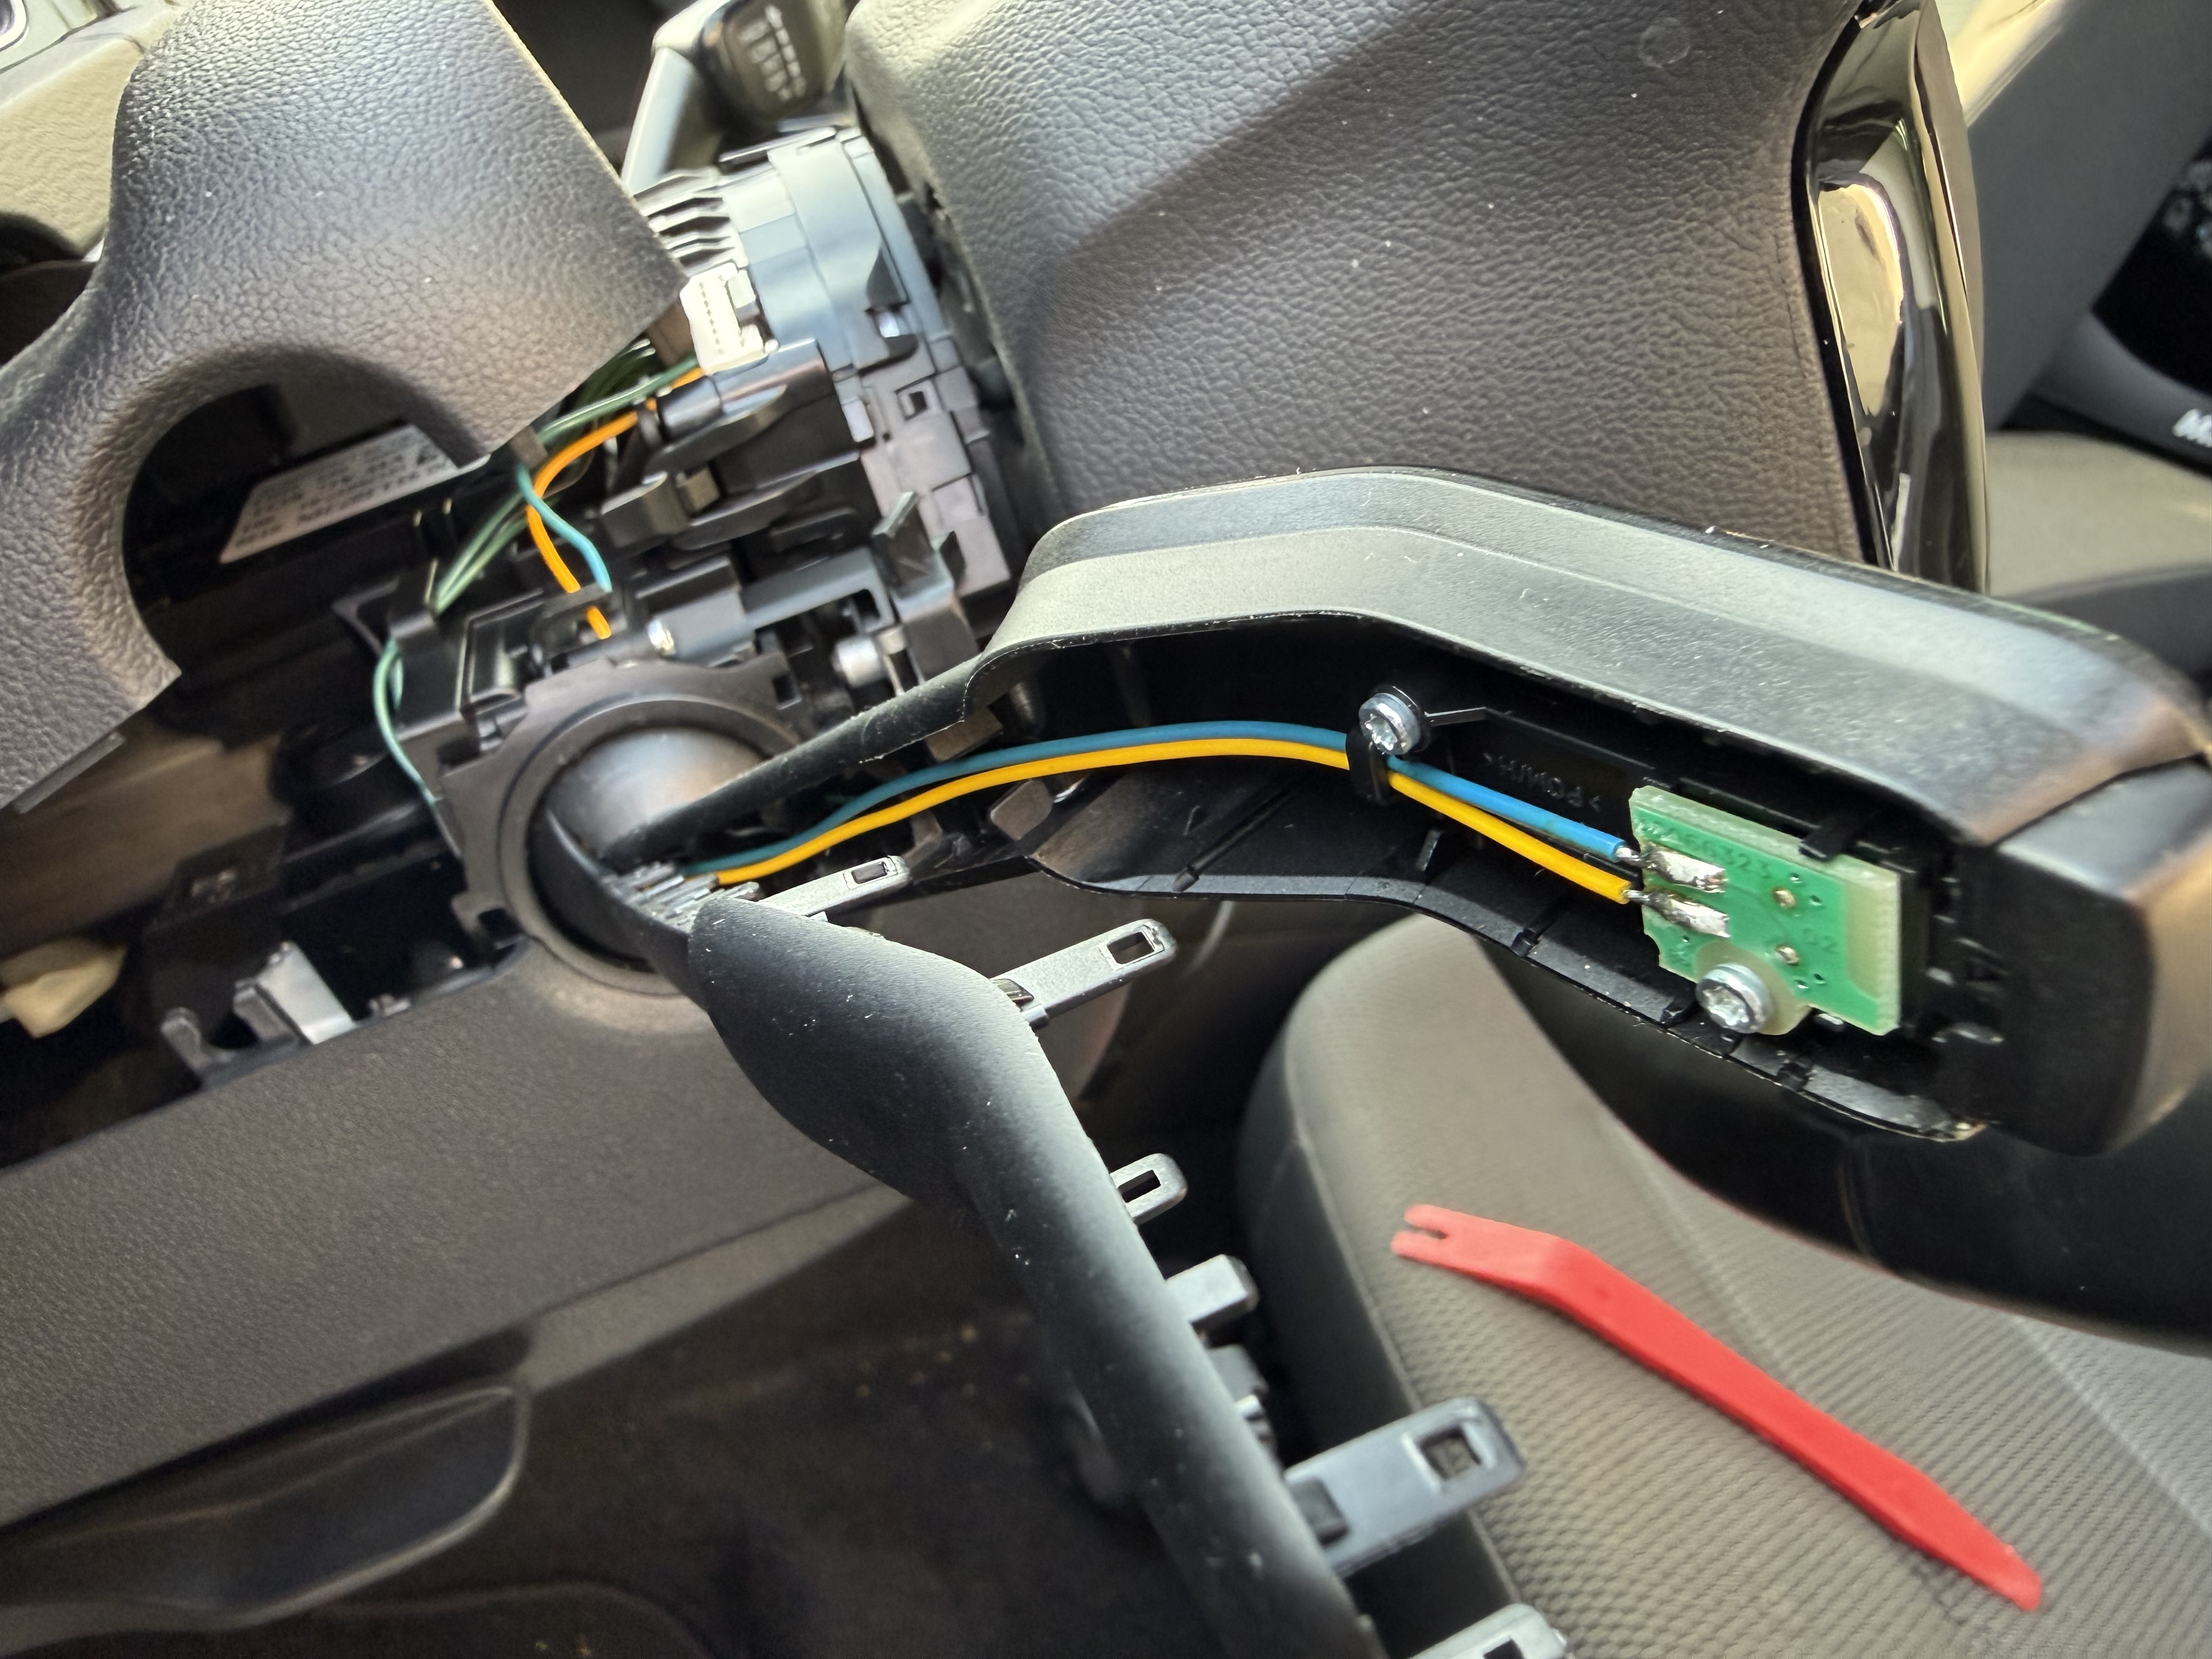
To see if I could replace the wire, I had to remove the back side of the stick. This was really easy, and showed me that I could replace the wire easily. It was not hard to remove the broken wire, and route a new one through the joint although I did use another wire to pull it from the top side. The old wire showed another break, so it was definitely a good idea to replace it. The yellow wire next to it was in OK condition.
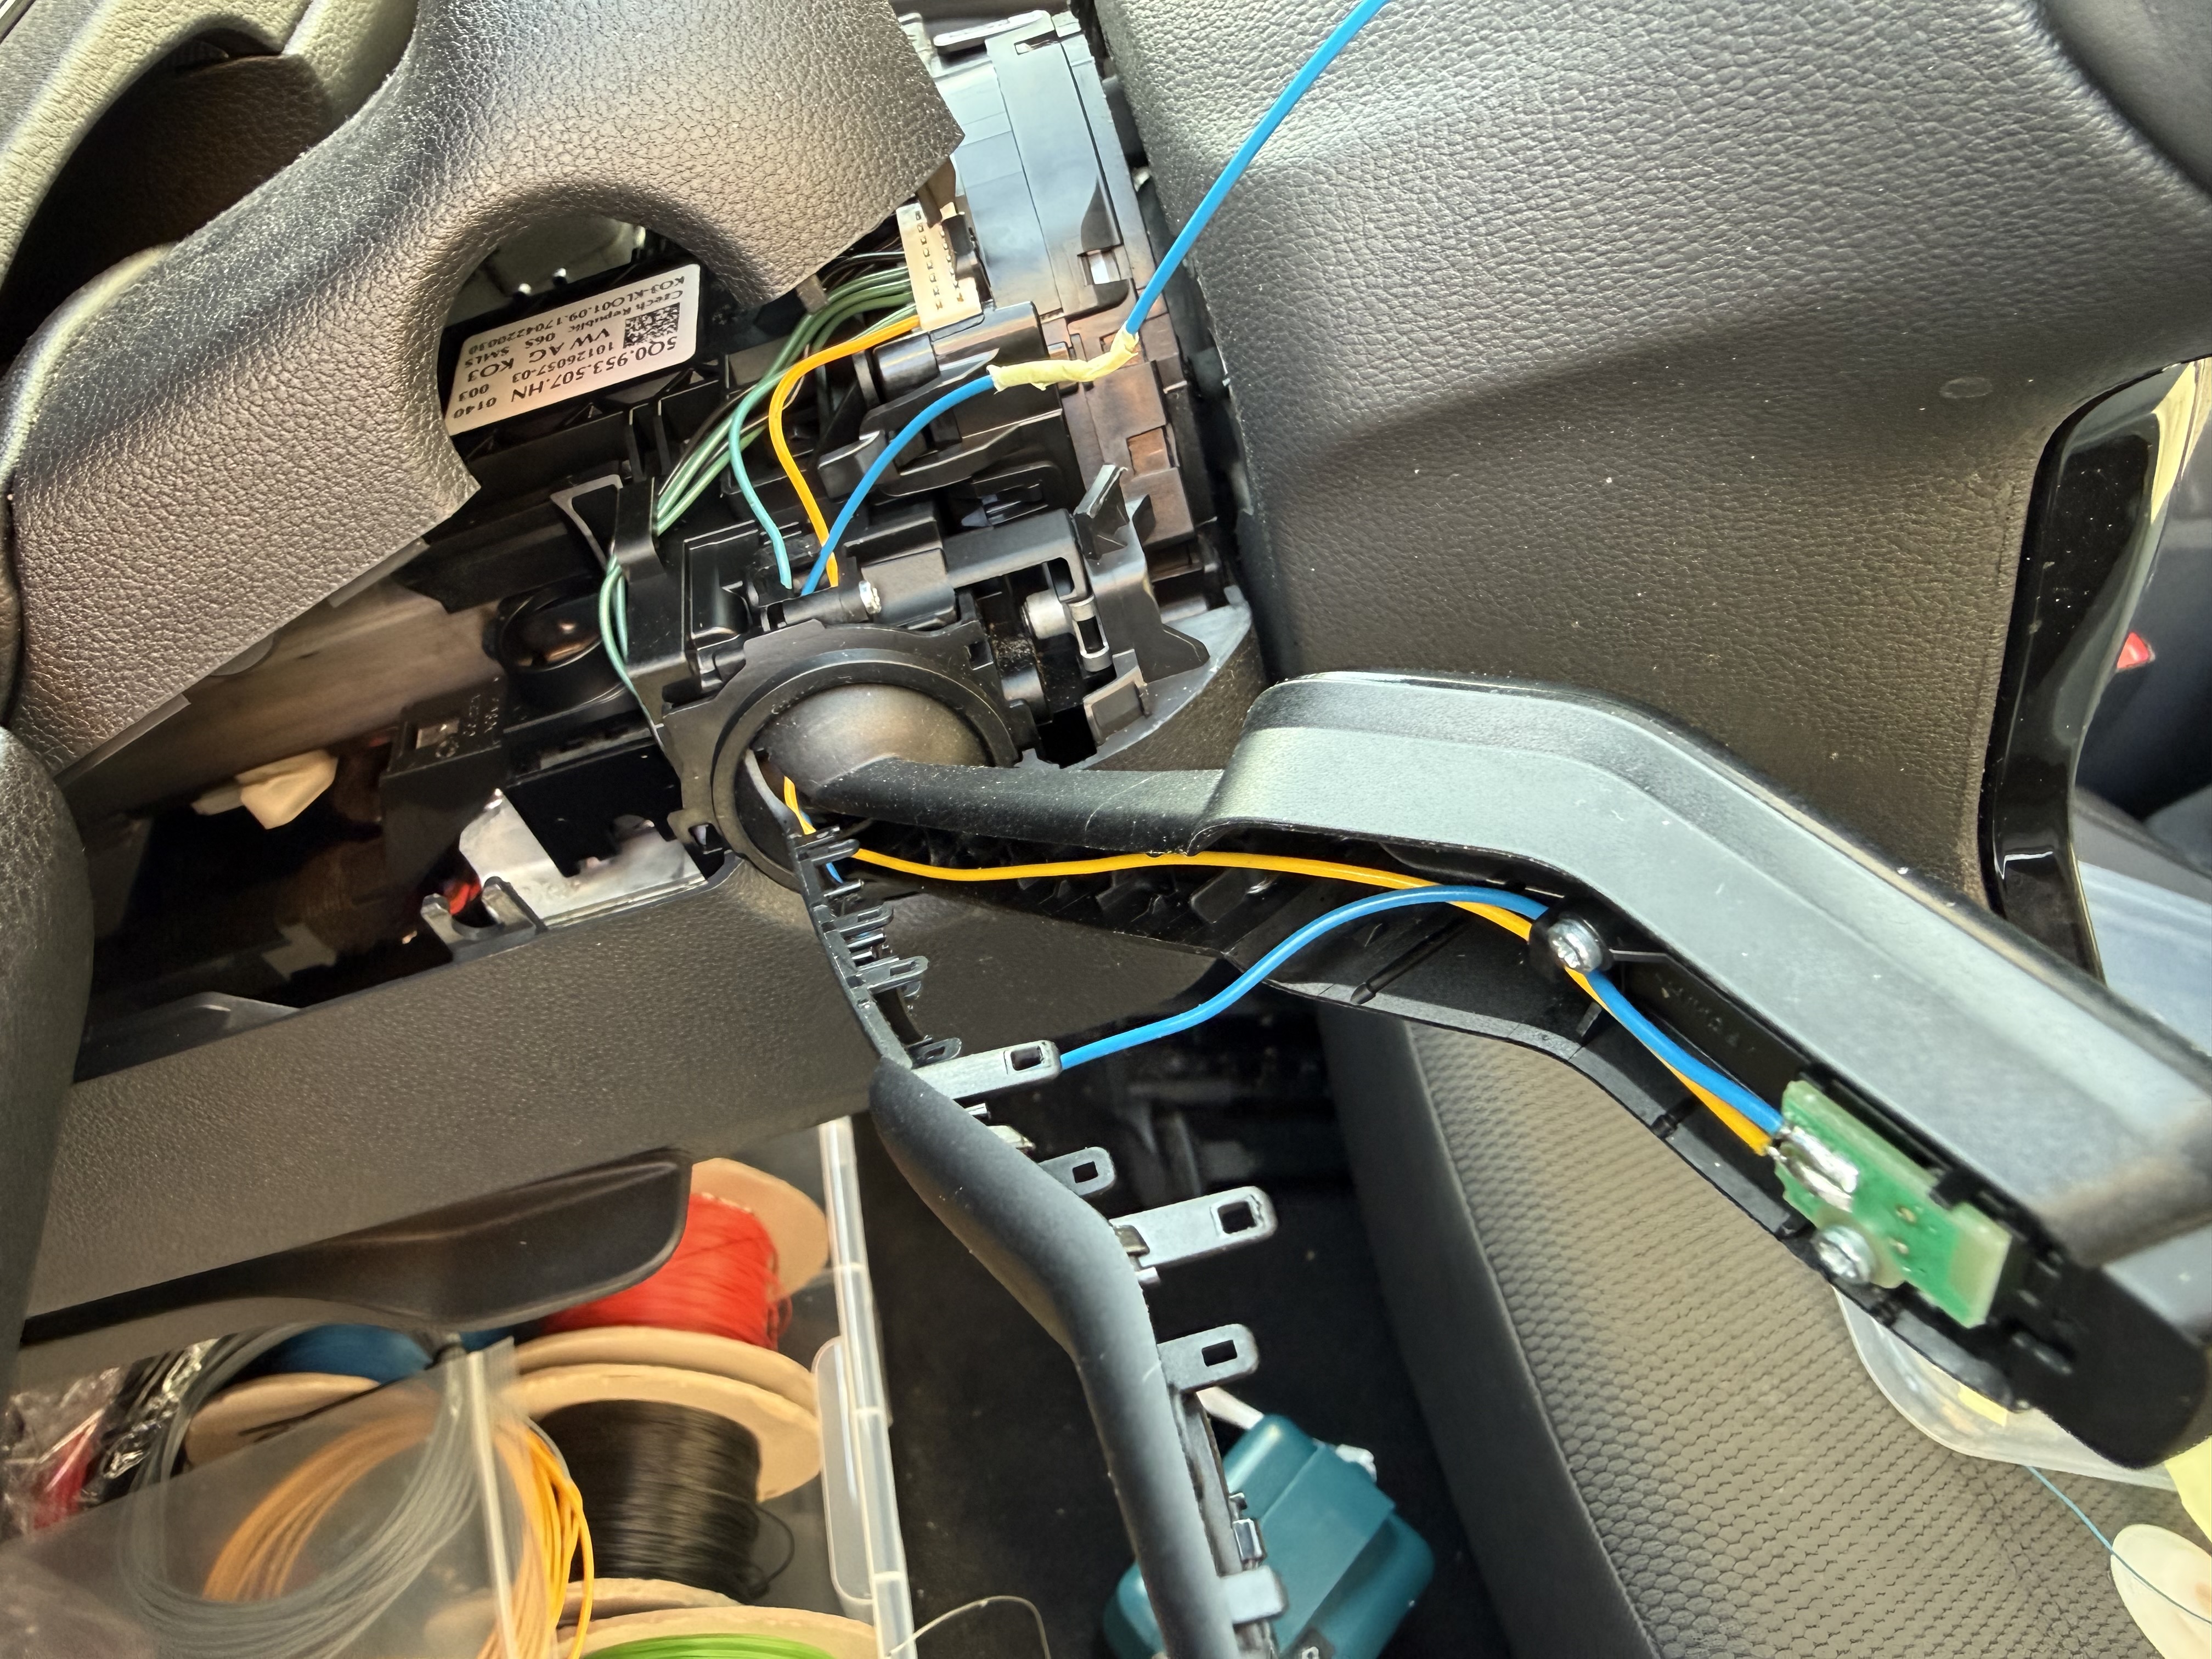
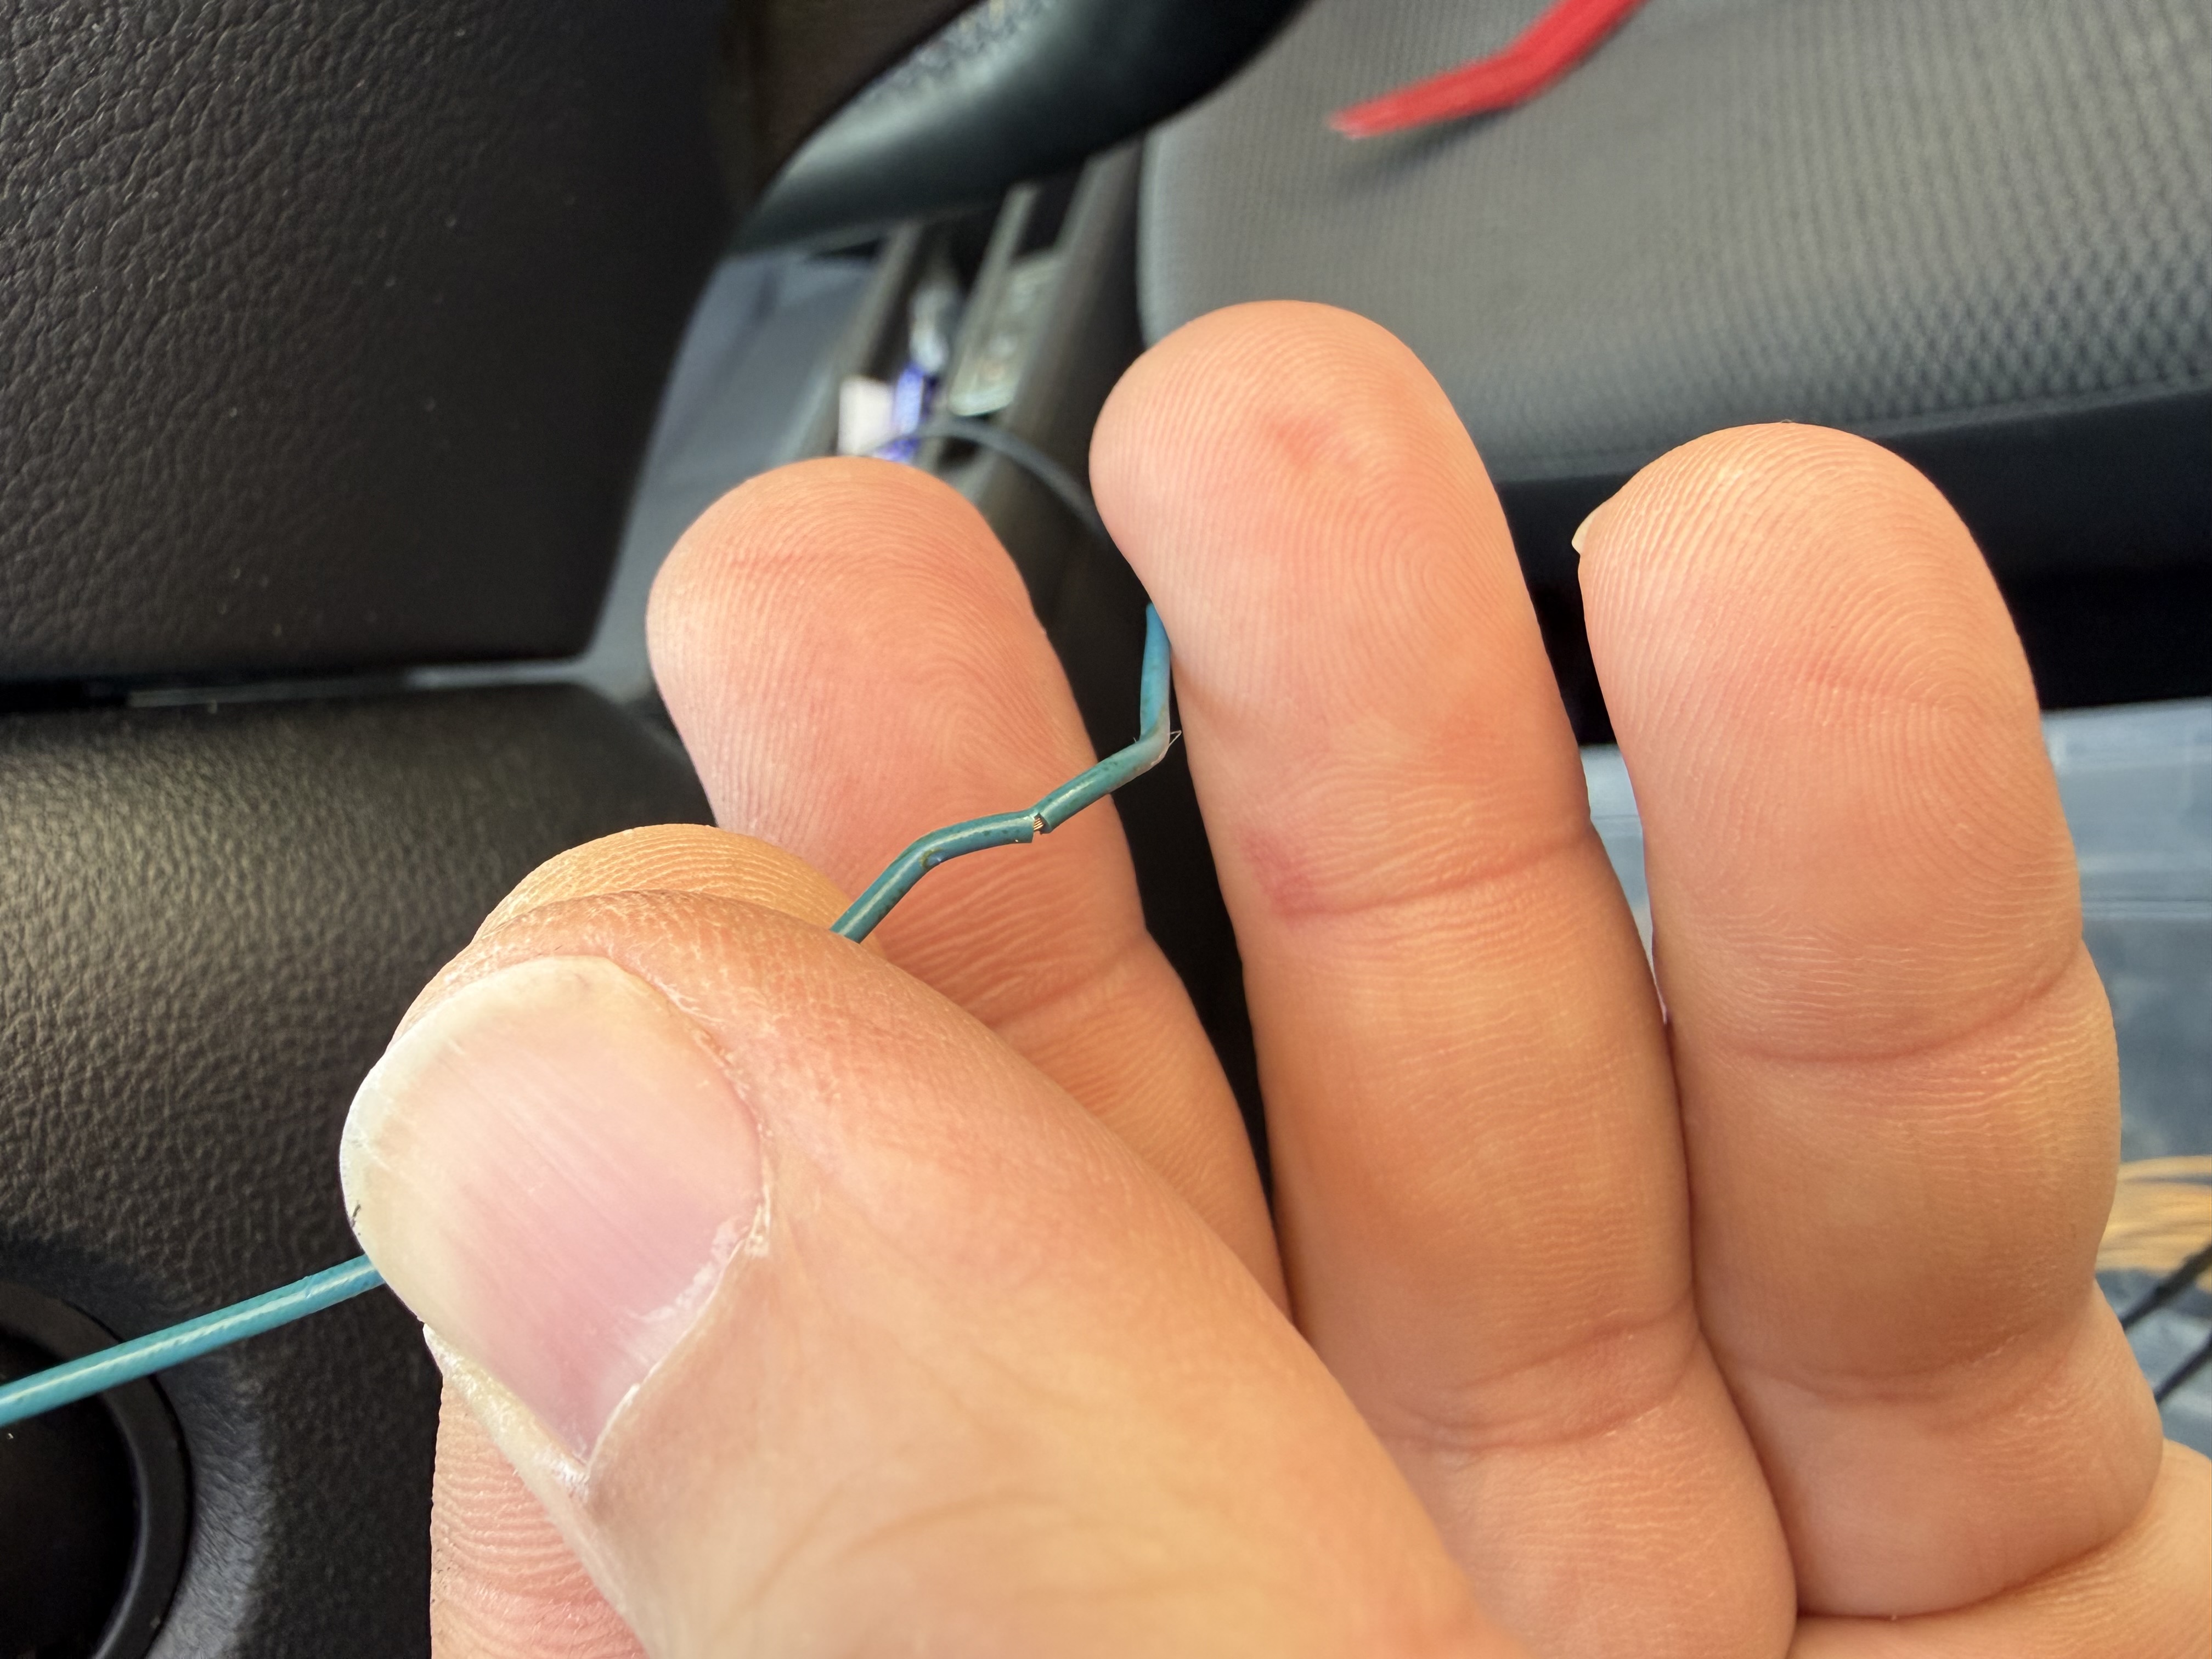
To complete the repair, I soldered the new wire to the old wire, and added a heat shrink tube for isolation. I chose for this option, because I did not want to cut the old wire too short, given that I cannot replace it on the connector side that easily. This way, I still have some length left if I need to do the repair again in the future. There is no downside to this, and the wire is not under any mechanical stress.

I think I have saved myself from quite an expensive repair, even though this
car is still under warranty. A proper repair would normally involve replacing
the entire combo switch module (I believe it is part number 5Q1 953 507, but
not sure about the index), which would go for well around 250 euro. Then there
is probably a diagnostic fee, and of course labor costs. A second-hand part
would be cheaper, but given that it is only a broken wire, I really don’t mind
a repair like this.